Showing posts with label Garden tips. Show all posts

Thursday, February 29, 2024

Yard and Garden Snake Repellent Tips

 Not all snakes are poisonous but if you are not a snake expert then it’s a good idea to take steps to repel the snakes from your yard and garden.  Here are some solutions that I have tried and found all of them to be effective snake-repellent

Copperhead snake Public Domain 


My home resides directly next to a densely wooded area and this area has its share of copperheads, garden snakes, and other snakes.  All of these snakes assumed that my yard was their habitat. Since my home is too close to a wooded area I knew I needed to take steps to keep my yard snake free.

My side yard heavily wooded with dense brush


If you live close to a park or a wooded area then I recommend that you take steps to make your yard and gardens unappealing to snakes before March.  Snakes typically come out of brumation (Brumation is specific to reptiles and amphibians where they sleep deeply during the cold season) in March or April depending on the weather.  If your temperature is an average of 60 degrees then snakes will be out and about.  The snakes in my area are most active from May through October.  

The best way to repel snakes from your yard and garden is to make it unwelcoming and uncomfortable. 

The first thing that we did was clean up the clutter.   We removed the down trees that were in the side yard and moved the firewood, logs away from the house.  Stacked logs provide snakes a safe place to hide. 

Firewood provides hiding places for snakes 


The leaf debris in the side yard that was on the limestone rocks was blown off and the rocks then we bought pea gravel from Lowes and added this rock to this area.  Snakes don’t like crossing rock so the smaller rock created a barrier for us to keep the snakes in the woods and out of our yard.  

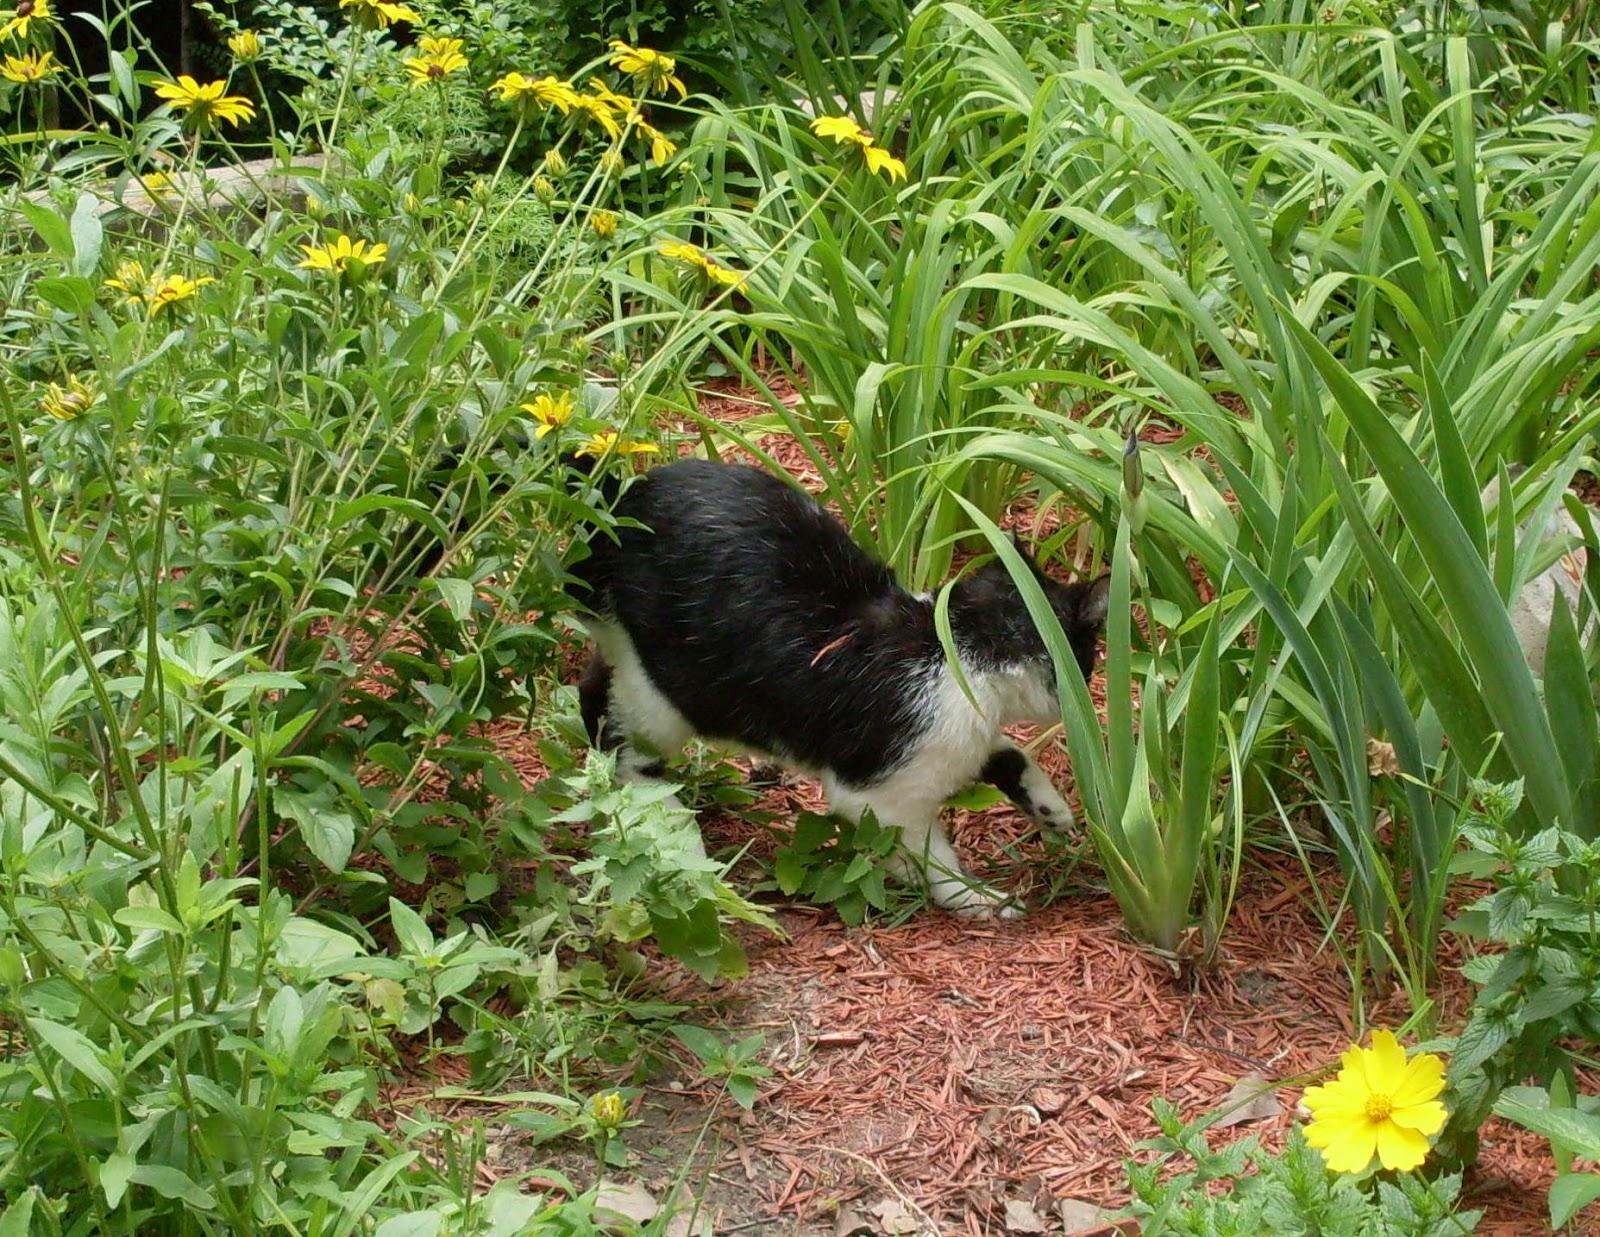
Another way to keep your yard snake-free is to clear all brush and avoid growing dense gardens like daylilies or irises grown in masses. A manicured garden with good airflow between plants rather than dense vegetation is a great way to eliminate places for snakes to hide.


My Iris garden with lilies growing behind. too dense needed to thin out 

Because snakes eat small animals like mice, lizards, and birds you would want to remove your bird feeders as they are attracting the snakes to your yard. 

The best way to keep snakes out of your yard is to install a fence that the snake cannot penetrate.  An aluminum or a metal mesh would be best.  They are strong enough to keep the snakes out of your yard. It's like chicken wire, but stronger with a small opening.   It's best to install the fence so that it's 30 inches above the soil line to prevent the snake from climbing over.  Higher than 30 inches would be better.  

You also want to dig a ditch in the soil to put the bottom of the fence into the ditch then add quick-drying cement to secure the bottom of the fence in the ditch.  By cementing the bottom of the fence, you will prevent the snake from getting into your yard from the soil line.  

Keep the snakes out of your yard with natural cedarwood, clove, and cinnamon bark or oil.  A few years ago, I had a snake in my garden and put down highly aromatic natural cedar mulch and the snakes left my yard and garden.   

Cedarwood has a strong smell that snakes dislike


Here is a snake repellent product that I found online at Amazon Exterminators Choice - Snake Defense Spray - Non-Toxic Repellent for Pest Control - Repels Most Common Type Snakes - Safe for Kids and Pets - Cinnamon Scented 

Monday, March 6, 2023

How to Stop Bamboo From Spreading

 Our home came with bamboo growing close to the foundation and we knew immediately that it would need to be transplanted to another area. What we did not know is that bamboo was invasive and that once it was established in your yard nearly impossible to stop it from spreading. 

photo by pixabay bamboo canes


My husband dug up the roots and replanted the bamboo by our patio At first we thought it was a good privacy barrier but soon learned that it was invasive and that we needed to prevent it from spreading. We cut the large bamboo canes with a saw at the soil line and followed that by cutting the new shoots as they emerged.

The following photos show the bamboo canes. You can see that they were planted too close to the foundation and growing out of control.


The best way to stop the bamboo from spreading is to control all new growth by cutting it back as soon as the shoots emerge in the spring and throughout the summer months.  


bamboo shoot appears in spring and summer


 Another way to control the spread is to mow over the new bamboo shoots.  Set your mower at the lowest level then mow over the bamboo, you will need to repeat mowing of the bamboo weekly to prevent it from growing back.  

 Many people will stop the bamboo from spreading by cutting back the shoots and then treating the area with chemicals or herbicides.  This method is a way to permanently kill the bamboo. Be aware that you may have to repeat the herbicide treatment a few times to stop the roots from spreading.

 We find the best way to manage the bamboo growth is to cut back the new shoots and cut the roots that appear just below the soil surface. Then mow the area weekly.  


Friday, June 30, 2017

Grow Catnip and Felines will Come

Growing catnip in your yard is not difficult but finding the required growing location is a must. You do not want to grow catnip close to your outdoor space because neighborhood felines will come to your yard and you would want them in the back section away from human traffic, especially if they are stray or feral cats.


I have 10 catnip plants growing in my back wildflower garden. I grew these plants from seeds that I planted in ¼ inch soil then covered with a light layer of mulch so the rain would not wash them away. The seeds grew into seedlings and then plants and as soon as the stem was 4 inches in height the cats started to arrive.

I did have to protect the young plants so I covered them with a metal hanging basket.  The basket came with a coconut fiber liner that I removed. What was left was a metal dome with open work. I set the dome-shaped metal container over my catnip plants to protect them from the cats.
The metal dome protects the catnip roots and leaves grown through the openwork.

The metal dome (bottom part of the hanging basket) is a great way to protect seedlings from foot traffic because the roots are protected.

So if you love cats, and enjoy watching them then grow catnip in your garden and felines will come.

The photographs that you view in this blog post are my original photographs of neighborhood cats visiting my catnip garden.


Learn more about gardening here

Friday, May 19, 2017

When to Water Seedlings or Transplants

Whenever you transplant seedlings or sow seeds to your garden the care directions are to water well and to not let the soil dry out. Today I was talking to a fellow gardener and she told me that she followed the directions for sowing seeds to an outdoor garden but the seedlings died quickly. She thought perhaps it was poor quality seeds. Know that her seedlings dying had nothing to do with the soil, the seeds but instead it had to do with the watering of the plants. My friend did not water the seedlings and the soil dried out.


Last week I planted 500 bee and butterfly flowers. I sowed the seeds into a bed of moisture control potting soil, then covered this flower garden with a light layer of mulch. I watered well after I planted them then continued to water the seedlings throughout the day. I watered the newly planted seeds four times daily. The soil never dried out and within 3 days the seedlings appeared with healthy leaves.
Beebalm seedlings with a light layer of mulch around the plant but not next to the stem. 

How much water is too much? Know that when you sow your seeds that these seeds are covered with one-fourth of an inch of soil. That soil can dry out quickly and dry soil will cause seedling stress. The light layer of mulch does help, but you must put it on thinly so as not to hinder the seedling from growing. But you must water your seedlings and water them often.
My friend watered her seedlings in the morning. The soil had dried out in a few hours, then when the sun came out and the day was hot the seedlings dried out and the plants died.
If you cannot water your seedlings four times a day then I would recommend that you set up a soaking hose and turn it on for a slow drip. Set the timer to turn the hose on and off in the heat of the day. You will need to water your seedlings or transplants in the morning before work or other activities. Then check the soil for dryness when you get home from work and water if needed. 


Wednesday, April 26, 2017

Benefits From Growing Catnip Herb

Many people have grown catnip in their outdoor gardens for their cat's enjoyment but this herb plant has appealing human benefits also. Catnip is known as Nepeta Cataria, a herb that reassembles the mint plant with the whole plant including the flowers and the minty fragrance.


You can grow catnip in the ground or in containers. I recommend that you grow catnip close to your outdoor seating area because when the flowers bloom they are very fragrant. Plus if there are mosquitoes you can break a stem to get at the catnip oil. Spread this oil onto your exposed skin and repel mosquitoes.

Here are photographs of catnip that I grow in my garden


Catnip herb can also be used for the treatment of human colds, fevers, and migraine headaches. Harvest the leaves of the catnip for herbal tea. Catnip tea is good when you want to relax. You can also smoke catnip, some say the herbal cigarette has wonderful relaxation properties.


Grow catnip from seed or buy a nursery-grown plant at a local garden center. Transplant catnip after the threat of frost has passed to a garden area that has full sun and well-drained soil.

Catnip is not fussy about the soil and will tolerate most soils. Plant the seeds in rows. Space the seed 12 inches apart. Cover the seed with 1/8 inch of soil and water the well. Keep the soil evenly moist but not wet throughout seed germination. You can grow from seed indoors or outdoors. I have had good results from sowing seeds outdoors.


***If there are cats in your yard then you must take precautions to keep your catnip plants safe as cats will eat the seedlings.***

Caring for Newly Transplanted Flower – Garden Tips

Many people shop for flowers at the garden center.  They will buy nursery-grown plants for their gardens.  The flowers will be planted in an area that agrees with their requirements.  Then the gardener will care for the flower, making sure it grows to be a healthy plant.  

Yesterday my neighbor spent a lot of money on a variety of flowers, I told her how to plant them, and when she finished she said, does nature take its course?  She did not realize that she had to take care of her transplanted flower.

For the next 28 days, the newly transplanted flower will need to be watched, and all new plants need care.  Here are a few garden tips that I recommend for all transplanted flower. 

Encircle the plant with mulch. Do not add mulch all the way to the plant stem as this will prevent the plant from getting water and other nutrients. Mulch is a good way to control weed growth and also keep the roots cool in summer. The mulch will also help to retain moisture and protect the new garden flower from suffering from dry soil.
Feed your newly planted flowers with water-based fertilizer like Miracle-Gro liquafeed bloom booster flower food once every 10 days throughout the blooming season.

Water your newly planted flower daily with a soaker hose in the morning or before the heat of the day. This hose will wet the soil and not the plant leaves. It is best to keep the soil evenly moist but not wet. Do not let the soil dry out.
Spot-check the flowerbed for weeds and remove them when you see them.  Watch the flower garden for pests

***Do not let the flower garden dry out throughout the growing season. Set the soaker hose on a timer and water in the morning.***

Monday, April 24, 2017

About Lilacs the Flowering Shrubs

If you like showy flowers that are fragrant then you should grow lilac shrubs in your yard. Lilacs are fragrant flowering shrub that blooms in mid to late spring. This showy flower can be grown as a hedge, free-standing accent plant or foundation plant. Lilacs are a long-lived plant that produces lovely flower clusters that are fragrant and can be cut for bouquets or as a centerpiece for the dining table.

When I was a child my neighbor had lilac shrubs growing along her driveway. Every spring when the flowers would bloom my mother would open the windows and the lovely floral fragrance would be enjoyed in our living room. So it is safe to say, that at a young age, I loved lilacs.

Lilac seeds appear in late summer

When I got married and we bought a home I joined an organization and received two small Old Fashioned lilacs. They were bare roots and did not bloom for five years. Of course, that was 18 years ago and now my lilacs are mature and have multiplied. 

My shrub is 6 feet in height with a similar spread.  I do prune my lilacs every other year.  Know that lilacs like water, so during the summer months I water them daily in the morning with a soaking hose.  Along with keeping the soil from drying out I also keep the area around my lilacs free of weeds and grass.  

Your lilac shrub will benefit from spring fertilizing and a layer of mulch.

Here are some tips on pruning your lilac shrubs.  Pruning will keep your lilacs healthy.

If you are interested in growing a lilac flowing shrub in your yard and garden then choose a planting area that has well-drained soil. I recommend growing this flowering hedge where you can enjoy seeing the showy flowers. 
The best time to plant lilacs is in the spring after the danger of late-season frost has passed. Planting on a cloudy day before spring rain is also helpful.
Learn more about growing and maintaining lilacs here 

Sunday, April 16, 2017

Spring Gardening - Hosta Plants


After the spring rain and a few warm days, I noticed that my hosta plants were coming up. There are quite a few plants that have green leaves and seem to be growing fast. Since the plants have new growth I knew it was time to work in the garden.

Here is a photograph of my spring Hosta Garden.  It was taken after I completed my garden maintenance.
Spring Hosta Garden, with daffodils leaves, and mulch


Today I did a hand pulling of the weeds and grasses that were growing in the hosta garden. There were also lilies that had spread into this garden. I dug them up and transplanted them into another garden.  Since it is early spring the daffodils plants have green leaves.  I did not cut them back, they will die back naturally.

When the garden maintenance was completed I added some compost that was amended with topsoil and mixed well before adding it to the hosta garden. This compost and soil mixture is a good way to feed the plants naturally.

Where I reside we do get a lot of rain in the spring and this rain can cause soil erosion. I decided to add a two-inch layer of cypress mulch around the plants to prevent the compost from washing away. Garden plants do benefit from a mulch application because it helps to deter the growth of weeds, keeps the plant roots cooler in summer, and aids in retaining moisture.

Here is a photo of one of my Hosta gardens


Hosta Garden Card


Wednesday, February 15, 2017

Early Spring Garden Activities

Winter is almost over and I find that I am thinking about the spring and summer season. There are many seasons in the year and I like them all, but spring is my favorite time of the year because of the yard and garden activities.


When the spring flowers break ground I know it is time to start getting my planters ready for growing flowers, and vegetables. I generally plant seeds and grow everything in my greenhouse. Then transplant outdoors after the threat of spring frost has passed.


Garden Activities


This week my husband is helping me to remove late fallen leaves from the garden beds. We are using the rakes and find it is a good way to work the soil for upcoming planting. I will also cut back the ornamental grasses, as the days getting warmer and this will encourage new growth.


When the garden cleanup is completed we will start new projects. My husband will make some raised garden beds for my strawberries and I will start working on garden plans. I like to draw out a diagram every year for my annual gardens. 

I am glad my husband is helping me to work in the gardens and do appreciate him making the raised garden beds.  

Here are a few articles that I published about spring gardening and plants that I grow in my gardens.
1. Growing Carrots in a Home Garden
2. Signs of Spring
3. Growing Lettuce from Seed
4.   Window Box Garden Tips

Working in your yard and garden is a great way to relieve stress. It is always fun to take before and after photographs of your garden. Then you will really know what you accomplished.

Retaining wall and privacy fence, garden by the driveway 


Friday, September 30, 2016

Keep Watering Gardens in Fall

Many people ask me if they should keep watering their gardens during the fall season and I reply yes especially if you season is dry with no rain in the forecast. Several flowering plants will continue to flourish in the garden until there is a hard frost.

Know that I do not water daily but I do not let my gardens and spring-blooming shrubs dry out. I generally stop watering when there is a hard frost and plants go into a dormant state.

Fall is the season when the weather can be hot, cool, and cold all on the same day. This fluctuation in temperature is hard on plants and generally, they will start to die back. When a plant begins to die back I will clean up the flower bed by cutting the perennial down to the soil or removing the annual. Then add a layer of much to the garden bed.

it is okay to cut back flowers that have been spent. I cut back my Shasta daisies and my Asiatic lilies as soon as the weather changed and nights got cool, the mid-40s.=[ However the days are warm and some days are hot which means my zinnias, at 4 o’clock, black-eyed Susan’s, and Sunflowers still have blooms.


I water my garden plants, and container gardens and also water the spring bulb beds until there is a hard frost. Here are some photographs of late summer and early fall blooming flowers
Zinnia Flowers will bloom until the weather changes; cold/ frost.

Chrysanthemums will continue to bloom until hard  frost 

Black-eyed Susan's keep feeding and watering and they will bloom until fall frost.

Sunflower is hardy, water with bloom booster and they will put out flower buds.

Wednesday, May 11, 2016

Planting Tips for NON-GMO Milkweed Seeds/ Butterfly weed

If you love watching monarch butterflies and other butterfly species then plan to grow non-GMO milkweed seeds in your garden, field, or other open space. Milkweed plants (Asclepias) are the plants that attract Monarch butterflies, other butterflies, and hummingbirds because of the nectar source. This plant is also attractive to Monarch butterflies for egg-laying. 


Butterfly white tree nymph and the milkweed plant


If you plan on growing milkweed this season then I would recommend that you start your seeds indoors. Milkweed needs a (cold season) This is an important step as the cold temperature is needed for seeds to germinate. 

So before you plant your seeds you would dampen a paper towel, set the seeds on the towel, and put the towel in a ziplock plastic bag. Set the bag with seeds onto a baking sheet or other flat surface and put it in your refrigerator for 30 days. 

Remove the milkweed seeds after 30 days and plant your seeds in starter kits or in the ground. If the weather is not hot, then plant outdoors, but if your temperature is 85 degrees Fahrenheit then milkweed will not germinate outdoors I would recommend growing them indoors in a container, then transplanting them outdoors.

Know that it is recommended to plant milkweed seeds in the fall for the following spring season. 


Saturday, February 20, 2016

Grow Violas in Containers - Garden Tips

  Now that it is early spring and the crocus and daffodils are blooming I want to add more color to my container's gardens and will achieve this by planting cool-season violas. Viola flowers are in the violet family; some are perennial, others are annuals and a few grow wild in your yard.


I find that the viola flower looks best when grown in freestanding containers, this is a small flower that seems to get lost when grown in the garden. Viola comes in a variety of colors; red, purple, yellow, and white are my favorite colors as these colors are so cheerful.


Before I plant in my container I always like to remove the plastic liner and I never use preexisting dirt. I will remove the dirt and wash the plastic liner with antibacterial dawn dish soap, rinse well, and let the liner air dry. Then I will fill the container liner with potting soil that is amended with compost or manure.


 When planting I like to plant using a color story I love violet grown with yellow and also containers of the same color violas.  Once the violas are planted, add some mulch before setting the container where the flowers will get lots of sun. 


This year I bought a variety of viola flowers from Lowe's garden center, know that it is important to watch the violas for the first month to make sure that the soil does not dry out. Dry soil can cause the plant to feel stress and it may die. You want to keep the soil moist but not wet. Too wet of soil is not good for Violas.


I do recommend applying a layer of mulch to go around the viola plants but stay a good inches away from the plant stem. Violas are hardy to 20” F which makes them ideal for early spring container gardens. 


Friday, July 17, 2015

Maintaining Backyard Wildlife Habitat


In 2004 my husband and I decided to grow a wildlife habitat that would naturally provide the songbirds, squirrel, deer and other wildlife with forage. We knew that initially the garden would not do as intended but within a few growing season we would no longer have to worry; the plants would adapt to the garden and the wildlife would have plenty of food.

Here are photographs of wildlife in the backyard habitat 

Raccoon by serviceberry trees 

Black butterfly and mimosa flower

Butterfly garden

Cat relaxing after visiting the catnip garden
Raccoon hiding in the grass garden

Well that was the plan and it worked well the first few years then came the droughts and the extreme heat during the summer months and we lost many fruit shrubs due to not enough water and or pests. We simply could not hydrate the plants with the water restrictions in our area.

So the following year we collected water from the spring rains in the barrels that I bought at Lowes.com. This was a good idea, however come end of July we had exhausted all of the water intended to sustain the habitat plants during the drought season.

Know that when we noticed the rain barrel water levels were getting low we then started collecting household water from bath, shower and water used to rinse the vegetables.  Yes taking buckets of water from house to outdoor rain barrel wasn't fun, the buckets were heavy and sometimes the water spilled out of the bucket when lifting to pour into the barrel. But by recycling the water we were able to have more water for the forage plants,  but it was not enough water to maintain the wildlife habitat throughout the summer.

Since we had lost many plants due to our extremely hot summers we decided to grow only native plants and other fruit bearing plants. Also instead of growing the forage plants away from the house we grew them closer. By doing this we were able to hydrate them with soaking hoses in the early morning on our assigned  watering days. We also invested in water retention mulch by Scotts. The cost of this mulch is higher than others but it is well worth it because it does help you to save water.

Initially our plan was to grow forage for the wildlife in our area, but with the changes to climates that idea became costly and one we could not afford to maintain.  Know that the wildlife habitat has changed to native plants that are maintained with the special water retaining mulch, soaker hose system that provide the plants at the soil level a slow and steady drip of water. We set these soaker hoses on a timer and water every other day for two hours in the early morning.

We continue to save the spring rain water but instead of waiting for the water level in these barrels to empty out before recycling, we started a water recycling system that we do constantly throughout the growing season.


By implementing the ongoing water recycling we found that the water barrel watering system does not deplete and has allowed us to continue to water our wildlife habitat during the hottest month of the summer.


Do you recycle water for your outdoor gardens?

Saturday, April 18, 2015

Garden Ideas for Small Yard


A friend of mine contacted me for assistance in creating a garden in her small yard. She lives in a townhouse and her backyard is very small and not private. If she put up a privacy fence then all she would need would be two panels on the sides and I thought she might feel closed in so I suggested that she invest in a lovely grass garden instead and create a private garden in her small yard.

The ornamental grass garden would add privacy and movement to her landscape plus the flower plumes are pretty. A grass garden is pretty summer through winter and is easy to care for too.

Along with the grass garden, I suggested planting some low growing daylilies and garden decorations; birdbath, outdoor bench, wind chimes and window box planted with colorful coleus plants.

Here is the digital set that I created for my friend. This set was used to show my friend how a few ornamental grasses can transform her yard and create a comfortable resting area where she could read a book or sip a cup of herbal tea.


When it comes to creating an ornamental grass garden I always choose tall grasses and then taper downward, ending with low growing border grass.

I recommend buying ornamental grasses at greenwoodnursery.com. This online nursery has a good selection of grass. My favorites are;


  1. Karley Rose Grass; Features dark green foliage pretty rose color flower plume
  2. white or pink pampas grass for showy flower plumes
  3. Add contrast to the ornamental grass garden with Red Rooster Carex grass.
  4. Accent the grass garden with low growing Elijah blue fescue grass with blue foliage or Lirope/ lilyturf with its dark green leaves and purple flowers in the fall. Both are low growing in a mound and will make the grass garden look eye appealing.