Thursday, December 29, 2011

Specialty Garden Ideas for Cat

Design a garden for your house cats or for neighborhood cats and this garden will provide the cats with a place to go for relaxation and entertainment.  The garden will become a safe space for your cats or neighborhood cats. 

 Once the specialty cat garden has grown the cats will be attracted to the grasses and catnip  The garden is a safe haven that provides cats with all that they need.

Photo of Lucy with cat house in the garden.  She loves her area with natural cypress mulch to keep her area bug free.

A stray cat that comes daily to the catnip garden

Here are photos of the cats that visit my garden.  It is a safe space for them.


If you love cats then you should create a special garden for them and they will come to visit you daily.

 Questions and Answers

Where should I design a specialty cat garden?
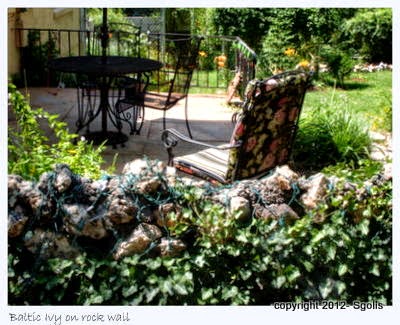
Choose a location for the cat garden that is away from people, pets, and car traffic.  Many people choose the furthest corner of their yard with two sides of privacy fencing.  If you do not have a privacy fence then you can install a trellis, plant shrubs, or ornamental grass.

What products are needed for cat garden?

Determine what products you will use for the cat garden.  You may want to install a water feature, a small pond, a sandbox and cat playhouse, and a feeding station.  Leave a section for cat grasses; wheat, barley, and oat also grow catnip and cat herbs in a sunny section of the garden.

How to design a specialty cat garden?
Use white marking paint to outline the cat garden on the ground.  Measure your area.  These measurements will help you when purchasing gravel, mulch, and assorted seeds for the cat garden.
Draw out your cat garden on paper.  Use colored pencils to highlight where each item will be located.  The cat garden design will help you when you are setting up the garden. For a medium-sized residential home, a cat garden with the dimensions of 10 x 12 is a good size.

After you have drawn out your garden design and purchased your products you would then get the cat garden ready for planting and set up by clearing the site with a tiller. Remove all rocks and grass.  Loosen the soil so that it is a fine texture.  Mix a two-inch layer of compost with the garden soil.  Make sure that the cat garden has proper water drainage.

Set up the sandbox behind the cat house. Plant rosemary or peppermint herbs a foot away from the litter box to mask the odor.   These herbs are fragrant and bushy and tall, thus they will provide the cats with privacy.  Install the litter box by digging a hole that is the same size as the litter box. Level the bottom of the hole. Set the box in a hole and fill it with fine sand. Line the litter box rim with a stone border and surround the litter box with 3-inches of pea gravel.
Cascade and Pond Kit

Add the water feature in the center of the cat garden.  The water feature will add interest to the garden and all cats enjoy listening to the cascading water.  They also enjoy getting their paws wet. 

What herbs should I buy for the cat garden? 

Buy cat herbs.  These herbs are beneficial to cats; rosemary, catnip, cat thyme, Valerian, peppermint, and dandelion.  You may want to plant herbs in containers to add interest to the cat garden or plant them in various sections of the garden.  


Where should I plant the cat grass?

Plant the grasses in front of the herbs. Start grass seeds inside, and then transplant them when the grass is about two inches high. On the other hand, you can sow by seed directly in the garden. These grasses provide the cats with vitamins, minerals, and enzymes, which help your cat digest their food, and control hairballs.

Tips:
The cat house will serve as the cat's bed and breakfast as well as storage for food, water, bed, and toys. The cat house is a great addition to the garden.

Mulch or add pea gravel around the water feature and litter box. 

Water grasses and herbs in the morning.  Deadhead spent blooms to stimulate new growth on the plants.  Remove dead plants and grasses.

Accent specialty cat garden with cat statue or decorative stepping stones.  Hang a wind chime for the lovely music. (Hang chimes high so cats cannot reach them) 


.


Wednesday, December 7, 2011

Forcing Hyacinths to Bloom Indoors


Blue bi-color Hyacinth
Forcing hyacinth bulbs to bloom indoors is a good way to liven up your winter home with color and fragrance.  

I like to force the hyacinths bulbs to bloom in a vase. 

 In October I will set up several vases and for the next 10 weeks I will store the bulbs in my cellar as it is a cool and dry area.  The bulbs will root in the bulb vase.  The vase holds the bulb out of the water but allows the roots to obtain hydration from the water. 

Forcing hyacinths to bloom indoors is a good way to decorate your home as well as add a fresh clean fragrance to air during the winter months.  You can feature indoor hyacinths in the pretty vases by setting them on your fireplace mantle. 

Another way to decorate with indoor grown hyacinths is to gather several hyacinth vases in the center of your dining room table and accent the flower centerpiece with votive candles and balsam greenery. Set a hyacinth bulb vase on your bedside table and the lovely fragrance will fill the room.  

Tips: 
When you grow hyacinths bulbs indoor you are bringing the garden indoors.

Growing the hyacinths indoors is not hard but does require that you pay attention to the evaporation of the water in the growing vase by checking on it daily


Learn more about how to force hyacinths to bloom indoors.


    Thursday, November 24, 2011

    Winter Care for Irises

        
    Irises are flowers that grow from a rhizome.  This rhizome is planted close to the soil surface; no more than two inches bellow the soil surface.  When winter comes there may be snow and ice and if the iris is not shielded from the winter weather the rhizome may be damaged. 

    Late November marks the end of autumn and soon the winter season will bring snow and ice.  This is the time to get the iris gardens ready for winter.  Care for your irises by removing the leaves, sticks, and acorns.  Then do a hand pull to remove any remaining weeds.  Protect the iris rhizome with a light organic mulch; pine needles, grass clippings or fresh wood from chipper.  


      Questions and Answers:
       
      Why do you apply organic mulch?  Organic mulch retains moisture, helps in preventing weed growth, provides root protection and when the mulch decomposes the nutrients improve the soil

      Why do your remove leaves from iris bed?  Leaves attract borers and rodents and these garden pests will eat the iris rhizome.  So it is best to remove all leaf matter from the iris gardens. 


      What is the best way to remove leaves from iris garden?   Removing  leaves from an iris bed is a little tricky because a conventional rake will uproot the plant.  The was best way remove the leaves is to blow them out of the garden.  Set the blower on low and slowly move the leaves out away from your plants. Slow and gentle movement will not harm the rhizome or disturb the roots.  If there are remaining leaves then go over the iris garden lightly with a metal tines rack.  By raking over the iris bed you will be able to remove the leftover leaves, sticks and acorns.  There will always be leaves leftover, that are buried in the foliage.   Remove the remaining leaves  by hand.  

      When do you weed your iris garden?

      Spot check for weeds in the garden before you apply the organic mulch.


      Irises grown and photographed by sgolis

      Tips:

      Remove the organic mulch from your iris garden in early spring.  Do this to prevent borers and other rhizome eating pests .


      View this video to learn more about caring for irises.


      Monday, November 14, 2011

      Landscape Trees -Planting and Buying Advice


      Buy a healthy redbud tree
      Planting a tree is not difficult however buying a healthy tree may be a little tricky.  A tree is an investment and will increase your property's value, so it is important to buy the right tree for your landscape. 

      When it comes to buying a tree for your landscape choose from tree roots that are wrapped in natural burlap or from trees that are grown in a nursery container. Always buy trees from a quality nursery and check the return policy and tree warranty

      I usually buy trees that are wrapped in a natural burlap covering. The wrapped root ball is an easier transplant.  There is no need to remove the natural burlap root ball cover because the roots will grow through the burlap.  This covering does not inhibit growth and because it is natural the burlap will break down in the earth over time. 

      Note: Before transplanting a tree that is wrapped in natural burlap (no wax coating) it is best to cut or pull the burlap away from the tree trunk. By doing this you will allow the tree to get air, and better hydration and the tree will not become infected with insects.  Some tree experts say to clip the wires that hold the burlap in place others say to leave the wires because the roots grow out of the burlap.  I have planted trees with the wires intact and I have also cut every other wire
       
      If buying a  tree grown in a container look for a healthy root that is growing outward. An indication would be roots growing out of the drain holes of the container. Another way to determine a healthy tree is to look for a full tree or bush with new growth.  A tree with brown leaves or dead branches is an indication that the tree is under stress or infection. 

      Removing the tree from a container takes work. You would need to set the container on its side and then roll it back and forth to loosen the soil.  Then gently pull the tree out of the container.  Loosen the roots if they are entwined and hydrate the root ball before planting by setting the tree in a bucket of water or hosing it down.

      Tips: 


      Buy trees for your landscape in the fall or in early spring.  Plant trees in the fall a month before a hard frost.  

      Plan on planting the tree in soil that is well-drained and in a location that provides the sun/shade requirement.  

      Transplant the tree on a cool and cloudy day to prevent unnecessary stress. Water the transplanted trees well.  Continue to water throughout the growing season and in the autumn months if there is no rain. Soil is best if it is evenly moist but not wet.


      Sunday, October 30, 2011

      Home and Garden Curb Appeal Ideas

      Is the entrance of your home welcoming to guests?   Is the landscape manicured or is the lawn overgrown with crabgrass?   Or does your home and garden need some curb appeal? 

      Here are a few of my yard and garden photographs


      Curb appeal says a lot about your house and if your front entrance is eye-appealing then your home will be a valuable asset to the neighborhood and if you intend on selling your home, buyers will be more attracted to a home.


      Why you should improve your curb appeal: 


      Improve your home's curb appeal especially if you intend on selling your home. A home that features a color scheme along with a manicured lawn, gardens, and welcoming home entrance is a home that will hold its real estate value. A simple remodeling will enhance the beauty of your home. 

      Choosing the right curb appeal theme for your home:


      Before you begin any curb appeal project take a picture of your home.  Then list from the pictures the areas that need to be improved.  To get some ideas for ways to make your home entrance look better is to buy home improvement magazines or garden and landscape books. Another way to get some ideas is to drive around your neighborhood and look at what your neighbors are doing.

      How to add curb appeal to your home:

      Make your home more inviting to guests by installing a window box.  Grow flowers or herbs in the boxes.  Plant ivy close to the rim of the box and it will cascade down the outside of the window box.  This attractive window box will improve your home and your neighbors will compliment you on your curb appeal. 


      Another way to make your home more inviting by improving your curb appeal is to install a natural stone or gravel path.  Design a meandering path that is attractive and inviting to guests.

      Plan gardens that will outline the path, and also add solar lighting. The path should connect your front entrance to the sidewalk or driveway.

      Another way to improve the appeal of your home is to paint your front door and then hang a seasonal wreath or flank your entrance with fragrant herb container gardens.  If you have porches why not add an inviting seating area with cushions that coordinate with your color scheme.  A free-standing fountain is tucked in the corner of your porch. 

      More Curb Appeal Ideas

      Consider painting your entire house with a new color scheme. A trendy color scheme that complements the style of your home will add warmth to your home entrance. A simple way to determine a color that would be suitable for the exterior of your home is to look at the colors in your roof shingles or stone facing.  Select the prominent color in the roof shingle, or stone facing your home, this color would be your primary color then select two complimentary colors for trim and accent colors. 


      Friday, October 28, 2011

      Container Herb Gardening - Rosemary


      Grow rosemary in a  freestanding containers and the rosemary stems will grow upright.   Rosemary stems are grayish with spiky aromatic leaves and grow to three feet. The flowers are blue and they bloom in August. . 

       I like growing rosemary in a containers gardens as I can move them outdoors in the summer and then bring them indoors in the fall. A container herb garden allows you to enjoy this tasteful and fragrant herb all year round.


      Herbs grown in containers : Freerangestock.com

      Before you buy containers for your herbs, check the growth requirements of the  rosemary.  Also check to make sure the containers have adequate drainage holes.  Once you have your containers for your rosemary you would then need to set them in an area that has full sun and has wind protection.  

      Plant the rosemary by digging a hole that is the same depth as the nursery pot. Gently remove the  rosemary from the nursery pot and loosen the root ball. Set the rosemary in the center of the hole and cover the roots with soil.  Water the rosemary until the water drains out of the container. 

      Containers require more water than plants that grow in ground. Water your rosemary in the morning as needed. Watch your rosemary and if the leaves seem to drop this is an indication that the plant needs water. 


      Learn more about growing rosemary in contains here:


      Tips:
      1. Rosemary is tolerant of cooler weather and can stay outside in 20-degrees . When temperatures dip bellow then bring your rosemary containers into the greenhouse or set them indoors next to a sunny window. I keep my rosemary in my kitchen on a bakers rack next to a window. There is a fan directly above and the air circulation is good for the rosemary.
      2. Harvest rosemary leaves by cutting the stems in the morning.
      3. Harvest the leaves before the flowers bloom.
      4. Use sprigs of fragrant rosemary to decorate harvest wreaths or to add to potpourri.

      Warnings:
      Watch for spider mites. Repel the pest with an organic solution.


      Tuesday, October 11, 2011

      Plants That Keep Cats Off Your Car


      Keep cats away from your car by growing plants that are repulsive to cats. Cats lying on your car can be annoying especially if you had your car washed or wax.
      Those tiny paw prints seem to be embedded in the hood of your car and windshield.  Many people find cats to be a nuisance especially when the cats are attracted to the family car. 

      The best way to keep cats from your car is to park it in a garage. If concealing your car behind closed doors is not an option then you need to make the cats uncomfortable and not welcome.  Achieve this by growing plants; garden mint, peppermint, lavender, lemongrass, thyme, chives, garlic and onions in containers or in gardens close to where you park your car. 

      Cats avoid areas where these plants are growing because the scent that the plants release is repulsive.

      Another way to keep cats off your car is grow citrus trees. If you live in a warm climate then plant two citrus trees in your yard. Citrus trees produce fruit and the skin that covers the fruit can be chopped and spread in your yard and driveway. 


      Cats tend to avoid areas that have the scent of citrus. So enjoy a fresh picked orange, grapefruit, lemon or key lime and toss the peels into your yard and garden and you will stop cats from jumping on your car.

      Tips:

      • You can grow patio citrus trees in a container and keep them outdoors during the summer.  Bring the trees indoors during the winter season and toss the citrus peel or treat the area with concentrated orange oil.  Cats find oranges to be repulsive.  
      • Mix citrus peels with used coffee grounds for a more potent cat repellent.
      • Saturate your yard and garden with the fragrant herb gardens for best results.   
      • I am a feral cat colony caregiver and cats are always seen crossing my yard, thee cats walk away from my herb garden. 


      Monday, September 26, 2011

      Autumn Yard and Garden Checklist


      Autumn is when you clean up your yard and gardens to get them ready for the winter season. There are many tasks to be completed so it is best to manage your time by making a checklist and then working in your yard and garden every day during the autumn season until the list is completed.

      Before beginning any yard and garden work I find it is best to take a notepad and walk through and jot down areas of concern.  Take your notes and make a checklist. The list will allow you to be efficient in your yard and garden clean-up. Organize the jobs so that they are all in one area.  Then complete one task before moving on to the next.  You will find that the checklist will keep you focused and you will work faster. Below is my yard and garden to-do list.


      Autumn Yard and Garden Checklist


      Pruning
      Prune all summer-blooming shrubs to shape them.  Also, prune all dead branches and remove tree branches that have died.

      Check Gardens for Overcrowding
      Divide perennials if there is an indication that there is overcrowding.  Do this if you have one month of fair weather before a killing frost.  Roots need a minimum of one month to become established. 

      Flower Gardens
      Remove the spent blooms from black-eyed Susan’s, and purple coneflowers if the days stay warm they may have new growth.     If it is late in the season, leave the spent blooms as they will provide food for birds throughout the winter season.

      Cut down all flowers that have died back and are not eye appealing. 

      Weed the garden beds in autumn. Weeding will prevent weeds from growing in early spring.

      Water gardens if the fall season is dry.  Stop watering when there is a hard freeze. Remove the hose from the faucet and put it away for winter storage.

      Watch for garden pests; slugs and powdery mildew.  When the temperature tips bellow an average of 85 F zinnias and bee balm are susceptible also watch for webworms.

      Containers
      Rejuvenate container gardens by planting cold hardy pansies, chrysanthemums, and Vinca minor or ivy to trail down the sides.

      Harvesting
      Harvest any remaining crop; tomatoes, corn, lettuce or herbs.  If you enjoy cooking or healing with herbs then transplant the herbs into containers and move them indoors.  Grow them on a sunny southern exposed window and enjoy the herbs during the winter season.

      Manicure Lawn
      In the fall the grass dies back. Before the leaves cover your lawn it is best to cut your lawn and use the edger to trim back where your lawn can't go. Manicure your lawn so that it looks presentable during the fall, winter, and early spring seasons.

      Lawn Repair
      If your yard is in need of repair September is the best time to use a tiller to ready the soil.  Work organic matter into the soil before planting grass seed.  For spot seeding, it is best to remove the dead grass and then till or use the spade to loosen up the soil. Mix organic matter into the soil and then spread the seeds.  Cover the seeds with a thin layer of compost and top with a layer of dried grass clippings or straw.  Water the newly planted grass seeds and keep the seeds evenly until the blade of grass in healthy and strong.


      Leaf Removal
      Rake the leaves from your yard. Recycle the leaves by adding to your compost or putting them in a leaf shredder. Make fine mulch. Use this mulch for gardens and for your shrubs.

      Plant Spring Bulbs
      When the average temperature is 60 degrees you would plant spring bulbs; tulips, daffodils, anemones, and hyacinths.


      Trees and Shrubs
      Autumn is a good time to plant trees or shrubs.  If you intend on transplanting a tree or shrub or planting a new one make sure to plant them a month before a hard frost. 

      Mulch
      Apply a thin layer of mulch on the garden bed, around the remaining flowers and flowering bushes.  After the ground freezes add a thicker layer of mulch.


      Sunday, September 4, 2011

      Evergreen Groundcover - Baltic Ivy


      The Baltic ivy is a fast evergreen ground cover that not only adds interest to your yard and gardens it also is a good way to prevent erosion.   The leaves on this ivy are blue-green with white veins making this ivy eye-appealing when grown in rock gardens, and on walls and it is very attractive cascading down the sides of a container.   
        

      Planting Tips for Baltic Ivy

      Plant Baltic ivy in the spring after the danger of frost has passed.  If you intend on planting the ivy in masses, then it is best to purchase them as a bare root.   I bought my Baltic ivy as a bare root and I got more plants for less money because I was a member at greenwoodnursery.com  

      Planting a bare root does require a longer rooting and growing time.  On average it took 14 days for the leaves to form on my plants.  Now if you going to plant the Baltic ivy in a feature garden or in a container garden then it is best to buy a nursery-grown plant. 

      Ivy grew by patio table
      Choose a garden site that has rich soil, good drainage, and sun to partial shade.  If your summers are Hot, temperatures in the mid 90’s to 100’s partial shade in the afternoon would benefit the Baltic ivy.

      Hydrate the bare roots by filling a pan with tepid water.  Set the roots into the pan of water and allow them to hydrate for an hour before planting. 


      Get Garden Site Ready

      1. Loosen a track of soil along the foundation wall or the back border of your rock garden. 
      2. Remove the grass, weeds, and rocks. Work a generous amount of compost into the soil. 
      3. Plant the ivy bare roots in a hole that will accommodate their root up to the stem.  
      4. Firm the soil around the stem.  
      5. Plant a nursery-grown ivy the same depth as their nursery container. Space the plants ten inches apart.  
      6. Water so the soil is evenly moist.

      Care for Baltic Ivy
      Apply two inches of mulch around the ivy. The mulch will help to control moisture and will reduce weed growth.

      Water the ivy in the morning so that the soil is moist but not wet.   

      Here are some of my photographs of Baltic Ivy. The photos below show you the quality of the plants that I bought online at greenwoodnursery.com  Know I have enjoyed the ivy for the last ten years.
      Baltic Ivy in Winter : snow
      Baltic Ivy stays green in winter

      Tips:

      1. Climbing comes naturally to the ivy, in a few weeks you will see vigorous branching.
      2. Feed the ivy in early spring with a water-based fertilizer like miracle grow.
      3. Add Baltic ivy to containers, and window boxes. The green leaf with the white veining will accent the flowers. 
      4. When the flowers die off the ivy will add color to your containers throughout the winter.
      5. Grow Baltic ivy in zones 5-6-7-8. 
      6. When the Baltic ivy is mature the height will be 12 inches.  


      Garden Idea:
      In the autumn, plant yellow daffodils mixed with red tulips in front of the ivy. The backdrop of the Baltic ivy will look beautiful when the flowers bloom in spring.