Saturday, March 5, 2011

Advertise Lawn and Garden Business

Advertise your lawn and garden business to get the exposure needed to attract new clients.  

A spring advertisement campaign will enable you to line up contracts for the upcoming season.  Advertisement is a great way to promote your skills and expertise to your community.  

Even if you are an established business owner, an advertisement is a nice way to remind your existing clients to contact you for upcoming jobs.  When you advertise your lawn and garden services you put yourself in front of the competition and you will have access to more contracts.


What is your Advertisement Budget?
Before you begin your advertisement campaign you need to determine your budget as you do not want to overextend yourself and then not have money to support your business needs.  

Determine your budget by listing your positive cash and then subtract your bills and all of your supplies that are needed for the upcoming season.  The money that is left over can be applied to your advertisement.  


Basic Advertisement Campaign
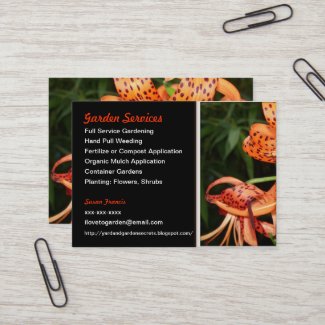
Start with a basic advertisement campaign such as making business cards.  Personalize your business card with business and contact information; name, phone, email, and website.  Also, add your company motto on the card.  

Give your business card to managers of garden centers, and local nurseries, and introduce yourself to local home builders.  

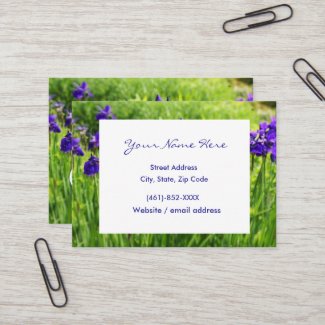
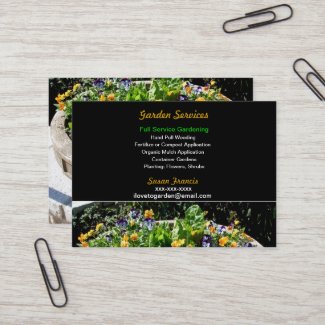
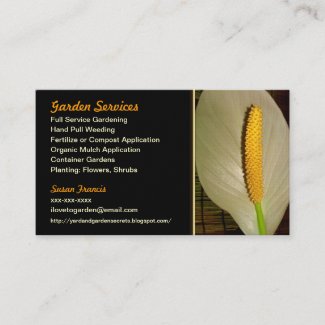
Here are some business card templates that you may like


Gardener Tiger Lily Floral Business Card


Purple Irises Flower Garden Mighty Business Card


Garden Services Business Card


Gardener Peace Lily Business Card


Word-of-Mouth Advertisement
Word of mouth is an effective way to gain new clients.  When a client is pleased with the service that you have rendered they will praise you to their friends and neighbors and thus you will gain new business.  

One way to exceed in word of mouth is to offer referral compensation.  This is a way to thank your client for sending you a new customer.  Award the client that has brought you new business by taking a percentage off their next garden or lawn service.  By giving referral compensation you have not only gained a new client but have also a guarantee of a repeat client contract because in order to get the percentage off they must hire you for another job. 

Another way to develop word of mouth business is to make sure that your lawn and garden is perfect at all time and then install a sign in your yard with a plastic cylinder that holds your lawn and garden service flyers.  Install your business flyer holder close to the sidewalk so that anyone walking by your yard can get a flyer.  They will see firsthand that you are skilled in your profession and will take your flyer.  Maybe they will contact you for a job or maybe they will tell a friend or co-worker about you.  The cost of this type of advertisement is minimal and the benefits are great.

Next Level Advertisement
Join local garden clubs and your local Chamber of Commerce.  Attend the monthly meetings and network your lawn and garden service  If there is a monthly newsletter where you can purchase a spot then consider advertising your lawn or garden service in the newsletter that goes out to all of the members, businesses, and alumni. 

Practice supporting other members of your club and they will support you by reciprocating.

Business Tips for Lawn and Garden Advertisement:

  1. Purchase a business listing in your local yellow pages. Advertise your name, the name of your business, your motto, and contact information.  Write "learn more about (name of your business)  and direct customers to your website.
  2.  Design a website that will feature photographs of your skills; specialty-designed gardens, before and after photographs, contact information, and client testimonials.

    Friday, March 4, 2011

    Growing Tips for Peonies

    Peony Shrub
    Peony flower and buds
    Grow Peonies in your yard as a flowering shrub or in your garden to add fragrance and springtime color.  

    Peonies are long-lived flowering shrubs that bloom in spring. Peony shrubs feature fragrant spring flowers, green glossy summer foliage, and vibrant red-hued leaves in fall. Once established in your garden the peony will grow seasonally for up to one hundred years

    Many people grew up with peonies as the plant may have been divided from their grandmother's peonies and the peonies are passed down as an heirloom, thus making the peony a cherished flowering shrub.

    Sorbet Peony
    Where should I plant peony?
    Peonies do not like to be disturbed so choose your garden site wisely.  It is best to plant the peony and then let it be.  If you transplant to another location in your yard, your peony will punish you for not blooming for the next two to three years.  

    Choose the garden site for the peony that features full sun to part shade, well-drained soil, and adequate growing space. If you are planting more than one peony, spaced three feet apart.

    What season is best for planting peony?
    Plant nursery-grown peony plants in the spring and plant peony tubers in the fall.  Fall planting should be done from August through September.  It is not recommended to plant the peony tubers later than September as it will not give the roots enough time to establish prior to the fall frost.
    Peony Sorbet

    How do you Plant Peony flowering shrubs?
    Purchase a nursery-grown peony in spring after the danger of frost has passed. Clear the garden site of grass, weeds, and rocks.  

    Loosen the soil so that it has a fine texture.  Work compost into the soil and then dig a hole that is the same depth as the nursery container.  

    At the bottom of the hole mix some bone meal for flowers and bulbs with the soil.  Lightly shake the soil from the roots of the peony.  I do this to encourage growth.  Set the peony in the center of the hole with roots facing outward. 

    The peony eyes need to be two inches below the soil line.   If you should plant the eyes deeper the peony will not produce flowers, or the flowers will be small.  

    How do you care for peonies?
    Keep the soil evenly moist but not wet the first season.  When new growth appears, apply two to three inches of mulch around the peony.  The mulch will aid in keeping the roots cool, retaining moisture, and will repel pests and weeds.  Keep the peony bed weed-free.  

    Once established the peony is drought tolerant, however, if your area is hot during the summer water the peony by drip irrigation in the morning.  Expect your peony plant to bloom in the third season.  If blooms are heavy use around plant stake to prevent the stems from breakage. 

    Cut off spent blooms and prune the stems to two inches above the soil after a hard frost.

    Here are a few photographs of the peonies that I grow in my garden. 

    Yard and Garden Secrets / Growing tips for Peonies
    Pink and white double peony Sorbet

    Yard and Garden Secrets photo by sgolis

    Growing Tips for Peonies photo by sgolis

    Yard and Garden Secrets Growing Tips for Peonies
    Pink Gal  Peony

    Growing Tips for Peonies photo by Sgolis


    Peony Tips:  
    If you need to transplant your peony, fall is the best time.  Choose a day that is cloudy or transplant at the end of the day when the sun is not as hot.  

    Water the transplant well and continue to water daily until a hard frost.  Always transplant a month before a hard frost so that the roots can become established.  

    Apply a thin layer of mulch around the transplant and after the hard frost cut back the stems and apply a thicker layer of mulch.

    Sgolis Recommends:

    Peony Sarah Bernhardt
    Peony Karl Rosenfield
    Sea Yellow Peony
    Lavender Sorbet Peony
    Pink Gal Peony


    Thursday, March 3, 2011

    Natural Deer Repellent for Yard and Garden


    Repel deer from your yard and garden naturally without harming the deer.  I reside directly next to 50 acres of dense forest and every March when the snow melts and the temperature turns warm, my spring bulbs and flowering shrubs will start to emerge. Tulips are favored by the deer and herds of deer will find their way to my yard and garden.  


    Many people believe that the deer eat tulips and other spring blooming plants because they are hungry.  However deer will eat seek your tulip gardens in the early spring because the plant is a good food source and because the stem of tulip provides the deer with hydration.  Tulips are rich in calcium and bucks need the calcium for spring antler development.  The doe needs the calcium for proper development of her fawn. Tulips may provide the deer with a balanced diet however that does not mean that they are welcome in my yard and garden.

    Repel Deer from Garden

    One way to stop the deer from eating your tulips and other spring bulbs is to mix the bulbs with daffodils.  Deer do not like the taste or the scent of the daffodil and will avoid the garden.  

    Plan a spring garden that features rows of daffodils that are in the front, side and back of the tulips. The deer will then pick up the scent of the daffodils and will avoid the tulips.

    Another way to repel deer from your yard and garden is with dog hair.  Brush your dog and remove the hair from the brush.  Set the fresh dog hair in your tulip garden, or around your Azaleas, Rose, Hosta, Hibiscus and Camellias.  The scent of the dog hair will repel the deer; however you must replenish the dog hair on a regular basis as the scent will fade.

    Through trial and error I developed a natural repellent that consisted of assorted hot peppers.  I slow cooked the hot peppers and when it was ready I poured the formula into a sprayer.  I applied the batch of homemade pepper formula to my gardens and flowering shrubs and I watched and waited for the deer. 

    Deer did not approach my gardens that were drenched in the potent pepper formula. The nasty tasting pepper formula works however you must reapply weekly so that it stays potent and you must apply after rain, sprinkler or snow.  Moisture weakens the scent and taste. This pepper spray is good when used during a drought or when no rain in in the forecast.

     Here is the recipe for an effective deer repellant.

    1/2 cup of dehydrated whole egg
    1 cup jalapeno juice
    1/4 cup cayenne pepper flakes
    1/2 cup chopped garlic
    1/2 cup chopped onions
    1 quart of water

    Mix ingredients in a saucepan and cook on the stove until it comes to a boil. Remove from the heat and allow the solution to cool to room temperature. Strain and then pour liquid into spray bottle. Spray the natural repellent on your tulips at dusk. For maximum strength, you will apply the solution every 2-3 days.

    Other Natural Deer Repellents

    Keep deer away from your plants with natural deer repellent.  Cedar creek makes a granular product that you use in your gardens.  I have a lot of deer and had tried everything to repel them; it is safe to say that I had my doubts about the product but was willing to try it.  I spread the deer repellent in my Hosta garden and I also filled 6 small bags (they come with the product).  The bags were filled with ¼ cup of the deer repellent and then I hung them throughout my yard.  Some were hung on low hanging tree branches, others on shrubs and a few on in ground stakes.  I also spread the deer repellent in my hosta gardens, rose gardens and around my tulips and hibiscus shrubs.

    I like the Cedar Ridge natural deer repellent because it is easy to use and it works.  There is no need to refill the bags or reapply the solution your gardens.  Other products you have to reapply after it gets wet; rain or sprinkler. The scent is intensified when it gets wet and product is effective for up to six months.  

    My neighbor told me about another natural deer product.  He used Deer Scram and it is also effective when applied around your plants and flowers.  

    If you want to keep the deer out of your yard completely you would shake the Deer Scram granules along the perimeter and shake into your flower gardens and around your trees and shrubs.  Apply an ample amount of this product so that the scent provides a barricade.  Deer will avoid your yard because of the scent, they will not enter your yard to drink from your pond or nibble on your plants.  Deer scram is effective for up to 30 days, retains strength during rain and snow.  Reapply every 30 days. 

    Sunday, January 30, 2011

    Hardwood Tree Habitat for Wildlife

    Several years ago I planted habitat for wildlife.  This habitat consists of hardwood trees;  White Ash, American Beech, Paper Birch, Boxelder Maple, Black Cherry, Flowering Dogwood, Rock Elm, and I also grow nut, pear, and apple trees.  

    Under the trees, I did a scatter planting of berry bushes; black, raspberry, and elderberry, these berry bushes feed birds and the forest animals.  
    wildlife forage: elderberry


    My tree habitat and berry-producing shrubs have grown and now my yard is attractive to wildlife. In the spring a fine crop of morel mushrooms will grow under the hardwood trees.  

    The morels grow at the base of the trees, where the ground is moist and rich and the air is humid from the spring rains. 


    Photo of my side yard where Oak, Maple,  Elderberry and
     flowering Dogwood trees grow 


    Growing a wildlife habitat has its benefits, once it is established it is easy to maintain.  You can harvest the fruits or you can leave the entire crop as forage for the wildlife.  
    Deer eat the berries and the clover that grows in my yard


    I have the best of nature, edible fruits and nuts, wildlife, and succulent morel mushrooms in the spring.  If you have a small yard you can section off a sunny area and plant 2 or 3 hardwood trees or apple or cherry fruit trees, then add some berry bushes and a water fountain or bird bath By doing this you will attract birds and other wildlife to your yard.  you may have a crop of morel mushrooms in a few years. 


    Note:  The best time to plant trees and shrubs is in the fall or spring.  If you are undecided on what trees to grow why not start by planting a crabapple tree.  This tree has pretty flowers in the spring followed by small apple-looking fruit in the fall.  Leave the fruit on your tree and it will provide birds and other wildlife food in winter.


    Thursday, January 27, 2011

    Crabgrass Removal and Lawn Care

    Crabgrass removal and lawn care are at the top of my to-do list. Today I went out to look at my yard and discovered patches of greenery in the lawn of brown. 

    This week we had a spring-like temperature and full sun.  I suppose it was all that was needed to germinate the seeds. Crabgrass grows from a seed in spring when the weather is sunny and the temperature is in the mid-'50s to 70s. 


     I am a firm believer that crabgrass needs to be addressed as soon as you notice it growing otherwise it will take over your yard. There is only one way to remove crabgrass and that is to kill it.

    Here's how I removed crabgrass from my lawn:
    .I sectioned off my yard by creating lawn care jobs.  I find this is a good way to complete yard tasks without getting overwhelmed.  I highlighted the backyard as an area that would need to be thatched.  Seems the crabgrass in this section was not removed in the fall.

    This section is a top priority on my list.  I plan to take advantage of Friday's forecast for 58-degree weather, by starting my lawn care projects. 
    Thatching Rake
    To thin out the grass I will use my thatching rake.  Thatching rakes have curved tines that enable you to clear your lawn quickly and loosen the topsoil so that it is ready for pre-emergent herbicide or grass seed.
    Normally I do not use a thatching rake on the lawn in the spring because it spreads crabgrass seeds but since I intend on killing the crabgrass I feel the thatching is needed so that the chemical can reach the soil'.  I will put the thatch in lawn bags and then when this job is completed I will then let my lawn rest. 

    There is a cold front coming in and they are calling for snow flurries.  The cold will kill the crabgrass.  The forecast is calling for five days of cold weather followed by spring-like temperatures.  

    When the temperature reaches an average of 50 degrees I will apply the crabgrass pre-emergent herbicide. The herbicide will penetrate the soil and kill the crabgrass and other grassy weed roots. 

     It takes approximately seven days to kill the crabgrass and grassy weeds.  Then the dead crabgrass will be removed from the lawn with the thatching rake and my lawn will be crabgrass and weed-free.  

    So this week I am out of the office; I am taking the time to purchase the products that I need for my lawn care. If it is warm where you reside go outside and start your to-do list for your lawn and garden care. While outside listen to the birds and breathe in the fresh air.  Now is the time to rejuvenate and get ready for the spring season.  I hope you all have a good week and if you have any garden or lawn care questions, please leave me a comment and I will get back to you.


    Thursday, January 13, 2011

    Improve Plant Growth with Healthy Bare Root

    Sorbet Peony is grown from bare root


    Improve plant growth by examining the bare roots.  A healthy bare root that does not have gray mold or root breakage will grow into a strong and healthy plant, tree, or shrub.  

    Many gardeners order bare-root plants and shrubs from magazines and online nurseries.  

    These bare roots are plants that do not have soil surrounding them and the seller can ship them easily to the customer because the shipping is not hard on the plant, they do not require moisture, and can be packed easily in peat moss.

    Every year I will start to plan my spring and summer garden and I will take advantage of the late winter sales that are offered at the online and mail-order nurseries.  

    I find that these companies offer a good selection of bare-root plants and shrubs and that the prices are fair.  I like to order rose bushes, flowering shrubs, and trees. 

     Over the years I have had better luck growing bare-root plants than planting a seedling that has been packed and shipped in the mail. I think my success in growing bare-root plants is because I examine the root very carefully.

    Bare root plants and shrubs are shipped when they are in a dormant state and depending on the time of the season, some of the bare roots may be wakening up and you will view new growth on the stems or branches. When you receive your bare root plants it is important that you inspect them.

    Examine the root by checking for gray mold on the surface of the roots. If the mold coverage is light and does not cover the entire root then clean the mold off with a white cloth.  Dip the cloth in warm water and then gently wipe the gray mold from the roots.  (Use care to not break the roots.)   

    If the mold is covering all of the roots and the roots feel soft then the plant is dead or close to being dead.

    You also need to check the bare root for damage. The roots may have been damaged in shipping. Look for broken roots or bends in the root. Cut off the bend with sharp garden scissors

     The root will then have the energy to grow well.  Remember a healthy bare root will grow into a strong and healthy plant, tree, or shrub.

    Note: If your bare root is dead, or is in poor quality, take a picture of the bare root and contact the seller. Inform them of the poor quality and offer to send a copy of the invoice and a picture of the dead root. 

     Most sellers will accommodate the customer by offering a replacement or will refund your money.


    Monday, December 27, 2010

    Design Ideas for Sensory Garden


    Garden bench with colorful flowers and container garden
    Design a sensory garden for your health and well-being.  A sensory garden is a natural way to relieve stress and anxiety.

    A few years ago my husband and I designed and installed a sensory garden.  Our garden is 22 x 34 which means that the size does not matter as long as you have room for all of the sensory stimulates; sight, touch hearing, scent, and taste.

    I had most of the material needed for the sensory garden; however, I did need to pull the garden together in order to make it flow nicely in the section of my yard.  I selected an area in my yard that was located on the side of the wood and designed a garden that featured sections. These sections were connected to each other with a pea gravel path.

    In one section I planted a culinary herb garden, in the other section I grew fragrant roses. In the center of my sensory garden, I added a medium-sized solar birdbath and planted Echinacea coneflowers and Black-eyed Susan. These flowers attracted hummingbirds and butterflies to our yard and garden. 

    Below view photographs of my sensory garden.


    In the back of my garden, in a focal area, I planted a small ornamental grass garden, and next to the grass garden was a small fountain.  This fountain is where the wildlife comes to drink. The outdoor seating area was limited so wood benches were set along the path.

    Elephant ear container garden by waterfall pond
    To add to the ambiance of the sensory garden I added garden accessories: wind chimes, solar lighting, bird feeders, and garden statues of fairies, frogs, and cats.

    Designing the sensory garden was an enjoyable garden project.  My husband helped me with the installation of a garden pond kit that we bought at Walmart.com we also bought solar lighting which was installed in a sunny section of our yard close to the garden path.

    We worked together as a team and now we are proud of our accomplishments.  The sensory garden healed us of our daily stress and helped us to focus on our priorities.

    If you work in a high-stress environment or if you suffer from anxiety then you should design a sensory garden as it will help you to achieve inner peace. 


    Note: It took us 28 days from start to finish to design and install our sensory garden.  We worked on the gardens daily, after work, and on weekends.


    Monday, December 13, 2010

    Preventing Powdery Mildew


    Powdery mildew is a fungus that attacks any part of your plant: leaf, stem, flower or fruit.  This fungus has also been noted on woody shrubs and trees.  Powdery mildew looks like a grayish white film that appears as dust.  If you treat the fungus as soon as it appears with a fungicide then you will prevent it from spreading to other plants.  

    One year I decided to grow 200 zinnias along my rock wall.  I kept the garden weeded, applied a thin layer of mulch to control the weeds and I watered with a drip line irrigation.  

    The garden site received 4 hours of full sun and 4 hours of part sun and 2 hours of shade.  I did not think that the part shade would affect the zinnias.  My husband and I went on vacation and when we returned I had powdery mildew all over the leaves and stems of my zinnia plants.  

    Before our vacation the zinnias looked good growing along the river rock wall but they did not have enough air flow and they did not have enough full sun, plus our garden sitter watered all of the gardens at dusk.  

    My zinnias didn’t have a chance as the odds were against them.  The following year I planted the zinnias in an open air garden that had 6 hours of full sun and the plants flourished.

    Thin out flowers to prevent powdery mildew: Image by Susan Golis
    You can prevent powdery mildew by choosing a garden site that has full sun, well-drained soil, and good air flow.  

    Check your flower garden for overcrowding and thin out if necessary. Another way to prevent powdery mildew is to water your plants at the soil level with drip line irrigation or soaker hose.   I water all of my plants in the morning before the heat of the day, I find that dusk or evening watering attracts garden pests.