Saturday, March 26, 2011

Keep Fresh Cut Flowers Longer


Keep your fresh-cut flowers longer without using floral preservatives by cutting your flowers before they bloom or buying an arrangement from the grower. When you start out with flowers that are ready to bloom they will open up throughout the week. 

I enjoy cutting flowers and making arrangements for my home decor.  I like the idea of setting a cheerful floral arrangement on the breakfast table and prefer that the flowers stay fresh for more than a day.  Through trial and error, I learned how to keep cut flowers fresher and longer. 


One way to keep your cut flowers fresh longer is to cut the flowers for your arrangement or bouquet in the morning when the temperature is cooler. Look for flower buds that are beginning to open. Cut the flower stem diagonally with a clean and sharp garden scissor


Once inside I like to rinse the flowers off to remove any garden pests and then I will remove the leaves from the stems so that the leaves are not inside the vase of water, leaves that are submerged in water will decay quickly.   

I will leave outward leaves as a little greenery looks good in a bouquet.  After I have trimmed the leaves from the stems I will look for a vase to accommodate my cut flowers.  I like to choose a vase that will provide the stems with plenty of room.  Wash the vase before you use it with hot soapy water and rinse well. 

Fill the vase with three inches of tepid filtered water.  (water that has no chemicals, pipe sediments, trace minerals, or bacteria). Your floral bouquet will keep fresh longer when the water is fresh and clean.  Add your cut flowers to the vase.


Maintain a fresh-cut appearance by removing the flowers from the vase daily.  Cut the stems of the flowers and empty the water from the vase. Wash the vase with hot soapy water before you refill vase with filtered water. Rearrange the flowers into the vase.


By changing the vase water daily and cutting the flower stems you will keep your fresh-cut flowers longer. 


Thursday, March 24, 2011

Growing Tips for Tomato Garden

Roma Tomatoes: Image credit Wikipedia Commons
Growing a tomato garden will enable you to enjoy all the culinary and health benefits of this delicious fruit.  

There is nothing better than picking a vine-ripe tomato when it is plump, red, and juicy.  One bite and you know that your labor of overseeing your garden was well worth it.  

I grow Beef Steak and Big Boy tomatoes for salads, sandwiches, and salsa, and my husband grows Roma tomatoes for Italian sauces.  We both enjoy the flavor of the tomatoes and we like those tomatoes because they are rich in vitamin C and Lycopene.  

Tomatoes are nature’s way to keep your body healthy.   

If you want to improve your health by preventing your risk of some cancers then grow and eat tomatoes. 


Gather garden supplies for growing tomatoes:
Tiller
Compost
Tomato plants
Shovel
Stakes or cages
Irrigation with timer
Pruning shears
Garden gloves
Mulch
Tomato fertilizer spikes


Decide on the type of tomato that you would like to grow.  Many people like to eat tomatoes raw and some like to prepare culinary dishes with tomatoes.  The choice is yours to choose your tomato plants based on your needs.  

When you decide on the type of tomatoes you would like to grow you need to next decide if you want to grow them from seed or from a nursery-grown container plant.  

If it is early in the season you could start your seeds inside; sow garden seeds 6 to 8 weeks prior to planting outdoors.  A plant tomato outdoors after the danger of spring frost has passed and the ground has warmed.

Over the years I have had my share of ups and downs when it came to growing tomatoes and I will admit that I learned how to grow this fruit the hard way.  I learned that in order to grow tomatoes you must meet all of the tomato requirements.  


Tomatoes like it hot so select a garden site that is located in full sun.  A minimum of eight hours per day will keep your plants healthy and the fruit will be large.  Tomatoes also like well-drained humus soil with a pH of 5.5 to 6.8.  A good way to achieve good soil for your tomato plants is to add compost or manure to your soil. 

Care for your tomato plants by applying organic mulch; pine needles, or grass clippings around the tomato plants.  The mulch will help to aid in moisture control, deter weed growth, and will enrich the soil with nutrients.  

Water your tomato plants daily in the morning with drip irrigation.  When tomatoes start to grow the stems will weaken and will need to be staked or caged for support.  Tomatoes plants will grow to a height of 3 to 10 feet. 
 
Tips:
  1. Remove the suckers that grow out in between the branches.   These suckers will compete for nutrients and will weaken fruit growth.  Pinch off the suckers.
  2. Refrain from overcrowding and space tomato plants three feet apart.
  3. Fertilize tomatoes once a month throughout the growing season.
  4. Tomatoes need one inch of water per week, do not allow them to dry out.  Better if the soil is evenly moist by not wet.
Warnings:
  1. Cracked or deformed tomatoes are due to not enough water.


Saturday, March 19, 2011

Old-Fashioned Lilacs Growing Tips


Grow old-fashioned lilac's and you will enjoy fragrant flowers every spring.  This spring-blooming flowering shrub will grow in your yard for many generations provided that you meet it's growing requirements.  


I love my lilacs and in the spring when the flowers bloom, the fragrance is wonderful.   Over the years I have taken many photographs of my lilac blooms and turned those photographs here are a few.


Know that growing the lilacs and getting blooms such as the ones in the photo card that it will take several years. So I recommend that you buy a nursery-grown shrub to plant in your yard.

Here are some growing tips

  1. You can grow the old-fashioned lilac as a flowering hedge and it will provide privacy as the lilac will grow to 15 feet in height with a 12-foot spread.   
  2. Select a growing site that offers full sun with well-drained soil.  The roots of the lilac are deep and prefer to not be wet so plant on the top of a hill or in an area where the water drains well. 
  3. Plant the old-fashioned lilac in the spring after the threat of frost has passed.  
  4. If you purchase a lilac from the nursery gently remove it from the container.  Hydrate the roots by filling a large bucket with tepid water.  
  5. Set the lilac root ball in the water for a half-hour.  While the roots are hydrating prepare your planting site. 
  6. Loosen the soil with your shovel and amend the soil with compost or manure.  
  7. Dig a hole that is the same depth and width as the lilac container. 
  8. Plant the lilac when it is hydrated.  Set the root ball in the center hole and fill the hole up with soil.  
  9. Water well.


Hand pull weeds then apply 4 inches of mulch


Caring for Lilacs

  1. Keep the growing site weed-free. 
  2. Apply 3 to 4 inches of mulch around the base of the lilac.  The mulch will help to retain moisture and discourage weed growth.  
  3. In early spring remove the mulch and apply compost or manure around your lilac shrub. This is a natural way to fertilize your flowering shrub.
  4. Reapply the mulch after you add the compost or manure. 

Other Garden Tips 
  • Remove spent flowers
  • Prune or shape annually after the lilac has flowered
  • Butterflies and hummingbirds will visit your yard when the lilacs bloom
  • Hardy in growing zones 3-7 


    Thursday, March 17, 2011

    Garden Clean up and Weed Removal

    Spring and fall is when you would cleanup your garden by removing all of the excess leaves sticks and weeds.  It is a time when you get your garden ready for the upcoming season. 

    Before you begin your garden clean-up walk through your garden and check the weed growth and grade your gardens by work level 1-3.  I use an easy grading system; 1 represents a garden that needs a moderate clean-up, this garden would be easy.  The next level would be a 2 and this garden would require some effort to do a spring clean up.  The 3 garden is the mother-load garden clean up.  The 3 level garden would need an extensive clean up.  I grade the gardens by work level so that I know what I am getting into and I usually tackle the hardest job first.   

    Make a list of products that are needed to do the garden work. I find it is best to be organized and have everything that I need before I start my spring garden clean-up.  If you have to stop while working, you may procrastinate, and spend too much time at the garden center so just purchase what you need before you start.

    I need these Products:
    • Heavy Duty Garden Gloves
    • Cushioned handle Garden Tools
    • Garden Knee Rest
    • Off Deep woods Pest Control
    • Waterproof Sunscreen
    • Yard Trash Bags
    • Preen Garden Weed Preventive

    Plan to start your spring garden clean up in the morning. Before starting any work in the yard I recommend doing a series of exercises that will allow you to stretch your muscles.  Stretch for about 20 minutes before beginning your garden work.  By doing this you will prevent cramping and sore muscles.  Work at a pace that suits your needs.  Try to get an entire garden done in one day and then work on the next garden the following day.

    For large flower beds you should section it off and then clean-up one section at a time before moving onto the next.  By doing this you will not become overwhelmed especially if it is a big job.  Remove all of the debris; last season leaves, twigs, branches and such.  Do a hand pulling of the weeds. For stubborn weeds, dig out the root.  

    Once the flower bed is cleaned, loosen the soil in the bed to about a inch, then sprinkle on some Preen Garden Weed Preventive.   I like Preen because it does not harm the plants or my flowers but it does prevent new weed growth.  


    Another way to control weed growth is to apply Scott’s natural scapes advanced color enhanced classic black mulch.  Normally I prefer to use natural cypress mulch but this year I opted for the Scotts black mulch .  The black organic mulch is a nice contrast to green foliage and also prevents weeds naturally. 


    Put the weeds and excess garden debris in trash bags before moving on to the next garden; complete each section before starting a new one.  

    Notes from Susan G
    Keep your garden clean up organized and you will work more efficiently.  If you have any questions please leave me a comment and I will respond.  Happy spring garden clean up everyone.


    Tuesday, March 15, 2011

    How to Grow Stella de Oro Daylilies: Care, Planting Tips & Bloom Guide


    Stella de Oro daylilies are one of the most reliable, long‑blooming perennials you can grow. Their golden‑yellow flowers bloom from June through August, and the plants stay compact, tidy, and easy to maintain. Whether you grow them in containers, along a walkway, or in a garden border, these cheerful lilies add color and brightness all summer long.


    Why Gardeners Love Stella de Oro Daylilies

    This variety grows 18–24 inches tall and forms a neat clump of arching, dark‑green foliage. The compact size makes it perfect for small gardens, rock gardens, slopes, and containers. Stella de Oro is also known for its repeat blooms, giving you color for months instead of weeks.

    Where They Grow Best

    • Sun: Full sun (6+ hours) for best flowering.
    • Soil: Well‑drained soil; not picky about pH.
    • Heat: In very hot climates (upper 90s), provide afternoon shade.
    • Water: Deep watering is better than frequent light watering.

    My Experience Growing Stella de Oro

    I grow Stella de Oro daylilies in a garden bed near my patio table, where I can enjoy their bright yellow blooms all summer. I also plant them along my back slope, where the green foliage and golden flowers look beautiful in large masses. They’re dependable, cheerful, and always make the garden feel lively.

    How to Plant Stella de Oro Daylilies

    Plant daylilies in spring after the danger of frost has passed. They are forgiving plants, but preparing the soil well will give you stronger growth and more vibrant blooms.

    Step‑by‑Step Planting Guide

    1. Choose a sunny location with well‑drained soil.
    2. Amend the soil with compost or aged manure for stronger plants.
    3. Dig a hole the same depth as the nursery container.
    4. Gently loosen the roots and place the plant in the center of the hole.
    5. Spread the roots outward so they grow naturally.
    6. Fill the hole with soil and water thoroughly.

    Planting Bare‑Root Daylilies

    • Hydrate the bare root for 30 minutes in lukewarm water.
    • Plant so the top of the root sits one inch below the soil surface.
    • Water deeply after planting.

    How to Care for Stella de Oro Daylilies

    Once established, these daylilies are low‑maintenance and drought‑tolerant. A little care goes a long way toward keeping them blooming all season.

    Care Tips

    • Water in the morning using drip irrigation when possible.
    • Provide deep watering (8–10 inches) rather than shallow watering.
    • Apply 2 inches of mulch when new growth appears.
    • Fertilize in mid‑May with a bloom‑boosting fertilizer.
    • Remove spent blooms to encourage repeat flowering.

    Final Thoughts

    Stella de Oro daylilies are one of the easiest and most rewarding perennials to grow. Their long bloom season, compact size, and cheerful color make them a favorite for borders, containers, slopes, and small gardens. With proper planting and simple care, you’ll enjoy bright yellow blooms from early summer through late August.

    Disclaimer

    Disclaimer: This post reflects my personal gardening experience growing Stella de Oro daylilies in Missouri Zone 6. Always consider your local climate, soil, and growing conditions when planting.

    Saturday, March 12, 2011

    Attract Wildlife with Crabapple Tree


    Spring blooms of crabapple tree
    Crabapple in full bloom


    Grow a crabapple tree for wildlife and for beauty. This tree is eye appealing in spring when flowers will cover every inch of the branches.  The spring blooms attract orioles and warblers, these birds enjoy the nectar that is found in the flowers.  

    In late summer the tree will bear fruit, the fruit is small only two inches in diameter and the appearance is much like a normal apple.  The fruit has a bitter taste however it is edible and you can make crabapple jelly. 

    I prefer to grow the tree for wildlife forage. Mockingbirds, bluebirds, robins, and waxwings eat crabapples.  Another way to feed wildlife is from the insects that are attracted to the fruit.  These insects provide forage for birds and bats. The small apple-shaped fruit will stay on the tree throughout the winter season. This fruit is forage for deer, possums, and raccoons.

    When I moved to the central states I joined the Arbor Day Foundation and in return they sent me 3 flowering trees.  These trees were 16 inches tall when I planted them and within two years my crabapple was three feet tall with a similar spread. 

    October crabapple fruit


    As I recall the crabapple bloomed the second year that I had planted it and produced fruit in late summer.  The tree grew an average of one foot per year and when fully grown it was 25 feet in height.  If you want to add a focal point to your landscape and attract birds and wildlife to your yard then grow a flowering crabapple tree.


    Thursday, March 10, 2011

    Yard and Garden Snake Removal


    Removal of snakes from your yard can be a little tricky especially if they are poisonous.  The best way to remove the snake is to make your yard uncomfortable and change its habitat. 


    My home is located in the woods and for years, my yard was snake heaven.  The snakes resided in our rock wall, and in the garden close to the pond.  Know that I do not mind nonvenomous snakes living in my yard, but the venomous snakes must be removed.
    Yard and Garden Secrets / photo by Sgolis
    Snake in my garden


     If you have snakes in your yard you will need to determine what kind of snake calls your yard home.  Black, garter, and non-poisonous snakes are fine they control the rodents, but if there are venomous snakes then I would recommend that you remove snakes from your property.

    The best way to get rid of snakes is to manicure your yard and remove their food and water source.  

    Remove ground-level fountains: Image by Sgolis
    Remove woodpile as it attracts snakes: Image by Sgolis

    Clean up yard and garden. Remove all clutter; leaves, woodpile, excess rock, straw, and ground-level compost.   Mow your lawn so that the grass is short, cut back brush, and weed your gardens. If possible remove all ground-level water fountains as they will attract rodents

    Treat the manicured lawn and garden with rodent pest control. By doing this you will remove the snake forage from your yard.  Make the snakes living area uncomfortable with mothballs. 

    Mothballs are toxic to other animals but when it comes to snakes they will leave the area that is treated.  The best way to remove the snakes from a rock wall area is to dig a trench that is a foot deep next to your rock wall  (see photo below of the trench that I dug)  Drop a few mothballs into the hole and backfill with the soil. Snakes that live in the rock crevices all year round will leave the area to get away from the mothballs.
    The trench along the wall for mothball snake control 


    Another way to control snake populations naturally is to encourage feral and stray cats to hang out in your yard.  These cats will hunt and eat the snakes.  

    If you are not a cat lover you can get rid of snakes from your yard by trapping them.  The humane snake trap is made of durable plastic however it is light in weight so if you intend on trapping outdoors it is best to set it up on a calm day.  The best way to achieve positive results from the traps to watch for snakes, note their location, and then set the trap close to where you have viewed the snake.  


    The trap is baited with the scent of a rodent and the interior of the trap has a glue board.  When the snake enters the trapped chamber it loses mobility and is not able to exit the trap.  

    If you have land that is overpopulated by venomous snakes, you can do a controlled burn.  Contact your local fire department to schedule a burn.

    Warning:

    Keep kids and pets away from mothballs

     Snake removal products that I recommend: 

    Humane Snake Trap
    Catchmaster Glue Boards

    You can find these products at Amazon.com, Walmart.com, and Lowws.com


    Sunday, March 6, 2011

    Window Box Garden


    A window box garden is a good way to improve the appearance of your home and to add curb appeal. A home that features window boxes at the entrance feels welcoming and cozy. If you have limited space in the yard a window box garden is a nice way to grow flowers and herbs. Caring for your garden is easy as many can open up the window to water their plants or harvest the herbs.

    There are many window boxes to choose from; many are made of wood and some are plastic and mount to the outside of your window. Newer window boxes are resin frames that you line with moss and then fill with dirt. These moss-lined boxes are well suited for Mediterranean style homes and the wood window boxes to look good on traditional or vintage homes. Choose the window box that compliments your home.

    Look for window boxes at garage sales, flea markets, antique stores and at your local garden center. If you are handy with wood and tools you can purchase plans for a window box and make one, then all you will need to purchase is the hardware to attach the box to your home. Treat the wooden box for pests. You would want to deter carpenter ants, termites, and other wood-boring pests from eating your window box. Decide if you want to finish the window box with a stain or if you want to paint the wood box. If you choose paint then seal the window box with a water repellent. This repellent will prevent the box from water damage.


    Get window Box ready for planting:

    Buy a plastic container to line your window box. The plastic container will hold the potting soil for your plants and it will prevent the wooden window box from deteriorating. Check the plastic container for drainage holes.  If the liner has no holes then use your drill to make holes in the bottom of the plastic liner.  The holes must be large enough to let the excess water out.

    Attach the wooden window box to the outside of the window, then set the plastic container inside the wooden window box and fill with a mixture of potting soil and compost.

    Choose plants for window box:

    Determine your color scheme. If your home is painted with neutral exterior paint, you could choose a bright assortment of flowers for your window box. Yellow, orange, purple, pink, red, or purple flowers would compliment your homes color scheme.

    Seasonal window box design tips:


    Rejuvenate your window boxes for the autumn season by adding cold hardy purple pansies, yellow mums, and Baltic ivy.  You can then buy small plastic pumpkins and glue them to the end of a craft store stick (20 inches)  Insert the pumpkin head sticks into the soil and you have decorated your window box for autumn.  


    Spring window boxes should be colorful and cheerful.  Plant a mixture of tulips, daffodils, grape hyacinths, and Baltic ivy along the rim.  Purchase 20-inch sticks from the craft store and small plastic spring decorations; butterfly, dragonfly, or Easter egg.  Then stick the decorated stick into the soil and you have a window box that will be well received by adults and children.


    Window box image by:  Alelk Sandak, Freerangestock.com first image, 2nd image pixabay.com


    Saturday, March 5, 2011

    Advertise Lawn and Garden Business

    Advertise your lawn and garden business to get the exposure needed to attract new clients.  

    A spring advertisement campaign will enable you to line up contracts for the upcoming season.  Advertisement is a great way to promote your skills and expertise to your community.  

    Even if you are an established business owner, an advertisement is a nice way to remind your existing clients to contact you for upcoming jobs.  When you advertise your lawn and garden services you put yourself in front of the competition and you will have access to more contracts.


    What is your Advertisement Budget?
    Before you begin your advertisement campaign you need to determine your budget as you do not want to overextend yourself and then not have money to support your business needs.  

    Determine your budget by listing your positive cash and then subtract your bills and all of your supplies that are needed for the upcoming season.  The money that is left over can be applied to your advertisement.  


    Basic Advertisement Campaign
    Start with a basic advertisement campaign such as making business cards.  Personalize your business card with business and contact information; name, phone, email, and website.  Also, add your company motto on the card.  

    Give your business card to managers of garden centers, and local nurseries, and introduce yourself to local home builders.  

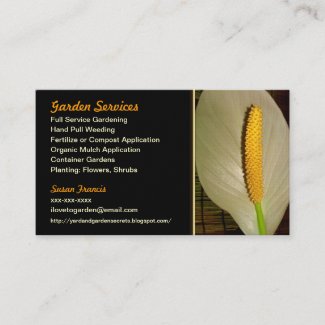
    Here are some business card templates that you may like


    Gardener Tiger Lily Floral Business Card


    Purple Irises Flower Garden Mighty Business Card


    Garden Services Business Card


    Gardener Peace Lily Business Card


    Word-of-Mouth Advertisement
    Word of mouth is an effective way to gain new clients.  When a client is pleased with the service that you have rendered they will praise you to their friends and neighbors and thus you will gain new business.  

    One way to exceed in word of mouth is to offer referral compensation.  This is a way to thank your client for sending you a new customer.  Award the client that has brought you new business by taking a percentage off their next garden or lawn service.  By giving referral compensation you have not only gained a new client but have also a guarantee of a repeat client contract because in order to get the percentage off they must hire you for another job. 

    Another way to develop word of mouth business is to make sure that your lawn and garden is perfect at all time and then install a sign in your yard with a plastic cylinder that holds your lawn and garden service flyers.  Install your business flyer holder close to the sidewalk so that anyone walking by your yard can get a flyer.  They will see firsthand that you are skilled in your profession and will take your flyer.  Maybe they will contact you for a job or maybe they will tell a friend or co-worker about you.  The cost of this type of advertisement is minimal and the benefits are great.

    Next Level Advertisement
    Join local garden clubs and your local Chamber of Commerce.  Attend the monthly meetings and network your lawn and garden service  If there is a monthly newsletter where you can purchase a spot then consider advertising your lawn or garden service in the newsletter that goes out to all of the members, businesses, and alumni. 

    Practice supporting other members of your club and they will support you by reciprocating.

    Business Tips for Lawn and Garden Advertisement:

    1. Purchase a business listing in your local yellow pages. Advertise your name, the name of your business, your motto, and contact information.  Write "learn more about (name of your business)  and direct customers to your website.
    2.  Design a website that will feature photographs of your skills; specialty-designed gardens, before and after photographs, contact information, and client testimonials.