Showing posts with label how to. Show all posts

Thursday, July 6, 2023

Grow Sweet Potato Vine Outdoors


Sweet potato vine is an easy-to-grow houseplant but it also can be grown outdoors during the summer months.  Then bring it indoors during the cool and cold months and it will add lovely green color to your space.


Normally I do not plant anything during the peak summer when the heat is extreme.  But that does not mean that it cannot be done.  Today my brother surprised me with sweet potato vines.  He saw them at Lowes and knew they would make a pretty plant for a hanging container so he bought it for me.


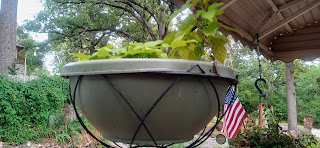
I planted my vines in a hanging basket.  I used miracle-grow potting soil and amended the soil with some manure.  Two vines were planted in the container so that there would be ample space.  After the vines were planted, I watered them well and found the drainage holes at the bottom of the container were okay. 


Cedar mulch was added around the plants to help keep the soil moist since dry soil would be hard on a newly planted sweet potato vine.


I hung the container on my porch where the plants would get six hours of light per day. Morning sun is best if your area is extremely hot.  My porch has shade in the afternoon and then some sun at the end of the day.  As a rule sweet potato vine needs 6 hours of sun but will tolerate partial sun.


If you plan on growing your sweet potato vine indoors then set the container near a sunny window where the plant can get 6 hours of sun per day.  Water to keep the soil moist but not soggy.


If your plant gets too full or vines too long you can trim to control the growth and to keep the plant's shape.

Learn more by reading my other sweet potato vine article 

Wednesday, June 14, 2023

Best Way to Get Rid of Poison Ivy

 About a week after the rain stopped we noticed that poison ivy was growing on our backyard fence.   We had to get rid of it because the entire plant can cause an itchy rash.


My husband said he would pull out the entire plant from its roots and dispose of it in a trash bag. This method will work but you may have to do it a few times.  

Before you begin you should put on protected glasses and cover your nose and mouth with a mask.  You will also wear long sleeve shirt and garden gloves. Be sure to wear pants and garden boots.   Best to not have any skin exposed to protect you from getting this toxic ivy oil on your skin and causing a rash.

Dispose of the poison ivy in a trash bag.  Don’t put in your compost because even dried poison ivy can cause you to get a rash and you don’t want to burn it either because it can cause lung irritation. 

 After pulling the poison ivy out by the roots it would be good to treat the area with a herbicide such as Ortho MAX Poison Ivy & Tough Brush Killer.

By treating the soil with an herbicide you will be preventing future growth.

Friday, June 12, 2020

Growing Sunflowers from Birdseed


I had not planned on growing sunflowers from birdseed but when I saw that seedlings grew from fallen seeds I was excited. All of the seedlings needed to be transplanted because they were growing too close. I did transplant all seedlings into a sunny garden bed. 


Sunflowers grow best in a sunny location and in soil that is well-drained. I found that the sunflowers are not particular about the type of soil as flowers have grown in rocky dirt as well as rich organic soil. The sunflower is a strong plant and as long as you give it what it wants, sun, water, and protection from wildlife; birds, squirrels, and deer then the sunflower will grow well.

How to grow sunflowers

Since I was planting birdseed I was not aware of the type of sunflower. The birdseed could produce a large flower or medium size so to be safe I did separate the seedling by planting them 2 feet apart.

I dug a trench that was two inches deep then added the seedlings 2 feet apart. Back-filled the trench and firm the soil around the seedling stem.


The seedlings were watered twice a day, morning and mid-afternoon so that the soil never dried out. Once the sunflower was established (20 days) I watered it once daily as this plant is drought resistant.

To help retain moisture I added cypress mulch around the sunflower stems.

The sunflower is a hardy and fast-growing flower on average the plant matured and developed seeds in approximately 80 days.

The birdseed produced flowers that were medium size but I did grow a few rather large sunflowers that were three feet tall. The taller flowers did need to be staked because the stems would break easily during a rainstorm or on a windy day.

Throughout the summer I would add new seedlings that grew from the birdseed as a new row planting and by doing this I had continuous sunflower blooms until the frost in the fall.

Enjoy this end-of-summer blooms as cut flowers for a centerpiece or harvest to enjoy the tasty seeds.


Pest Control

The sunflower is a magnet for birds, squirrels, and deer. The deer enjoy eating the entire plant but really like the flower blooms. Squirrels and birds love the seeds.

To keep the deer away from sunflowers I installed a 6-foot chicken wire fence around my sunflowers. To keep the birds and squirrels away I kept the bird feeders filled with their favorite seeds. Of course, there were always a few birds that preferred fresh seeds from the flower.

Here are some products I created from photographs, watercolor illustrations, and graphic designs of sunflowers.

Tuesday, December 17, 2019

Christmas Cactus After Holiday Care


If you love indoor plants that have beautiful flowers and are easy to grow, then a Christmas cactus may be the perfect plant for you.

I received a Christmas cactus that was covered with buds but had no blooms. So I fertilized it with Miracle-gro bloom booster every two weeks and in no time I had beautiful pink blooms. The flowers only lasted one day but I had many buds to enjoy during the Christmas holiday.

Unlike other cactus, the Christmas cactus will thrive in cooler temperature. An ideal temperature would be 68 degrees. So a cooler room with moderate light is best for your Christmas cactus. Do not put your cactus in direct light and a southern exposure would be too hot and would burn the leaves. I prefer to set my cactus off to the side so that the light is moderate and not direct.

Know that over watering your cactus will kill it. Evenly moist soil is not good for your Christmas cactus. I would recommend that you let your cactus soil dry. before watering. Allow the water to drain out of the pot. Do not allow the water to collect in the saucer. Instead of watering your plant daily you should lightly mist the leaves of your plant daily to maintain a level of humidity around your cactus plant.

After Christmas caring for you cactus is easy as long as you keep the plant in a cool room away from a draft or a heat source, provide it with moderate light and do not over water then your plant should thrive and live a long life of 20 to 30 years.

If you have cats or dogs you do not need to worry about the Cactus plant. According to the ASPCA poisonous plant database the Christmas cactus is not toxic or poisonous to cats or dogs.

Learn how to force your Christmas cactus to re-bloom by viewing this video.


Sunday, September 30, 2018

Indoor Growing Tips for Chives

Chives are a delicious perennial herb that is in the onion, leek, and garlic family. You can grow chives outdoors and indoors in a container as long as it gets ample light in a room that has good air circulation and the soil does not dry out.


Start the chives outdoors on the ground or in a container. The chive is easy to grow from a bulb or you can plant it by sowing seeds in the spring. When fully grown chives tall sword-like leaves will reach a height of 10 to 12 inches. When planting it is best to grow a clump of chives in a container or on the ground and I recommend planting 5 or 6 bulbs so the plant can grow into an attractive clump.
Harvest the leaves of fully grown chives for your salads, soups, 
stews, dips and herb bread recipes


The best way to grow chives indoors is to dig up chives from your outdoor garden after a hard freeze and replant them into a container. Clip back the foliage before setting on your sunny spot. Water and fertilize the chives and wait for the new growth. You have tricked the chives into thinking it is spring and chances are there will be pretty purple flowers on your plant. Learn more about herbs here

View recipes for chives below


Friday, August 17, 2018

Best Way to Harvest Apples

Where I reside we harvest Johnathan Apples in early September to October. These apples are by far the best for eating fresh from the tree to baking your favorite apple pie. 

The apples to ripen will be located on the outside on the southern side of the tree, then they will ripen inward to the center. So your first harvest or early harvest will be the apples that are exposed to the southern sun.

Apple trees naturally drop their apples when they are ripe in order to self-seed and reproduce. Watch for an apple or two to drop from the tree to determine if they are ready to pick

My Dad taught me how to determine if an apple was ripe. The best way is to pick one from the tree and bite into it. A mature apple will be firm to the touch, crisp, and juicy and the seeds will be brown. The most obvious sign to watch for is color. Golden delicious apples will change from green to yellow when they are ready to be harvested and red delicious will turn entirely red

As a kid, I used to harvest apples with my dad so that my mother could put up apples for jam, applesauce, and for pie. Harvesting apples is a fun thing to do on a sunny afternoon as long as you have the right supplies.

You will need:

Sturdy ladder
Burlap sack that you wear around your shoulder to hold the apples.
Durable gloves to protect your hands.

Set the ladder up close to the trunk of the tree and make sure that it is on level ground so you will not fall. Climb to the top of the ladder or as high as you need to be to harvest apples from the branches.

When your apples are ripe, they should be fairly easy to pick from the tree with a simple upward twist of the apple. If the tree is heavy with apples you may be able to stand on the ground and reach up to harvest the apples.

As a rule, we will pick almost ripe and almost ripe apples from the tree because you can put them in cardboard boxed or large paper brown bags to store in a cool place (60 to 70 degrees) and the apples will ripen.

Thursday, July 21, 2011

Easy to Grow Elephant Ears

Elephant ear garden by pond
An elephant ear is a tropical plant that is grown from a bulb.  This plant earned its name because when the stem grows upright out of the bulb a large elephant ear-shaped leaf will unfold at the tip of the stem. This ornamental plant comes in many colors; green, purple, or black and some leaves have white veins. 


Grow elephant ear in a container
Elephant ear container
Mature elephant ear plants will grow to a height of 2 to 10 feet with a leaf spread of two feet. Because of their large size and spreading habit, the elephant ear is a good choice to grow along a garden path or grow as a group as a privacy screen for your patio or outdoor living space.  


Growing Tips


Grow elephant ears as perennial in warm humid climates or grow as an annual during the summer when the temperature is an average of (68 to 88)   Choose a garden site with part sun and shade. Elephant ear grows well in moist to wet soil that has organic matter.  If you have a pond then plant the elephant ear in the moist soil along your pond.  If not grow an elephant ear in an area where the soil is evenly moist.  


Ready the garden site


One bulb will require a space of 36 to 60 inches. Allow space for the elephant ear to spread.  When you know how much space is needed for your elephant ear garden, you would then clear the garden site by removing the soil and then using a  tiller to loosen the soil to 10 inches deep.  Work the soil by breaking up the clumps so that the soil is a fine texture.  Improve the soil by adding compost or manure.  Also, add soil that will aid in retaining moisture.


Planting Elephant Ear


Dig a hole that is 8 to 10 inches deep. Plant the bulb; flat side down.  The top of the bulb should be planted no deeper than two inches below the soil.  Water well.  The plant will emerge in approximately 2 to 3 weeks.  


Tips:
  • Provide the elephant ear with its growing needs; part sun and shade, rich organic soil, and evenly moist soil, and the plant will provide you with beautiful foliage and a summer flower.  The elephant ear is a great plant for a beginner gardener because it is easy to grow. 
  •  
  • Grow the elephant ear in the ground or as an accent plant in a large container.
  •  
  • Set up a soaking hose or drip irrigation to provide the elephant ear with water.  Install a timer on the faucet so that the plants will be hydrated automatically and you will not need to worry about turning the faucet on or off.
  •  
  • Refrain from allowing the soil to dry out as this will cause stress on the plant and the leaves will wilt. 
  •  
  •  Elephant ears can become invasive when growing in tropical climates. If this occurs then divide and transplant them in the spring or divide them in the fall after you lift them from the ground.
  •  
  • Lift the bulbs in the autumn after the foliage has died back and before a fall frost.  Store the bulbs in a cool and dry area until it is time to plant them in spring.
Image Credit Elephant Ear bulb
Image Credit Elephant ears grown in masses

View the video to learn how to care for elephant ears during the winter months.