Tuesday, January 27, 2015

Gardening During Winter Months

Normally this time of the year there is snow on the ground but instead bitter cold temperatures we are blessed with warm spring like weather.

 Due to the warm weather  I had two clients that needed help with their gardening needs and I was busy last week doing  yard and garden projects. This week I find that the  weather will be warm on Wednesday so I am making plans to work in my yard and garden.  I really love being able to work in the garden during the winter months.
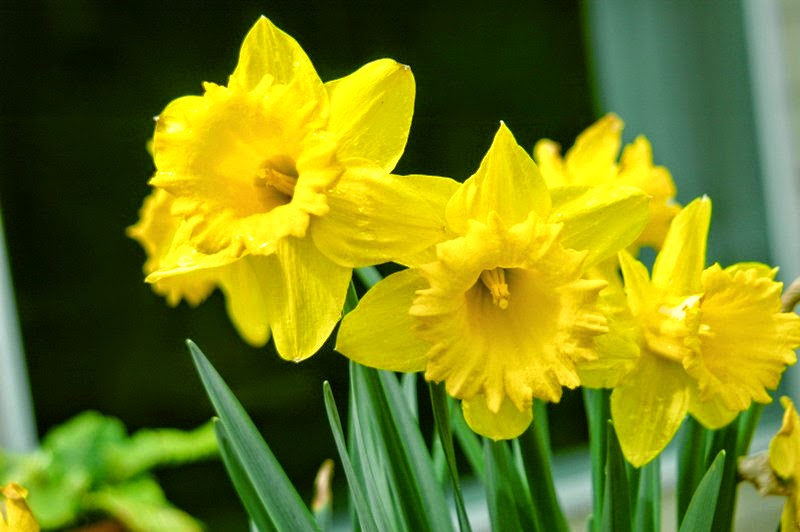
Normal weather in January is Snow

There is not much to do in the backyard but I would like to fertilize the irises especially the ones that met my husband weedeater last fall. These irises took a beating because he cut them almost to the tuber. 

The extra soil  around the tubers will be good because the last snow did cause erosion and many of the roots are exposed.  I am mixing compost, potting soil and bone meal and will fertilize my tulip bulb garden, lily garden and the irises.

When that garden project is completed I plan on adding new mulch around the garden path and fill in where pea gravel is needed. I think the mulch and gravel will make the yard and gardens look good for the rest of the winter.
Gardening During Winter Months, cleanup gardens

Then all that is left to do is trim back the ornamental grasses and remove any leaves from this garden.  I really love that we are having warm weather during the winter months as it allows me to get my gardens ready for planting and my yard cleaned up.

Thursday, January 22, 2015

Another Productive Day in the Garden


Today I was up early and out the door before stopping for coffee. I needed to be at my client's house at 8 AM to do their spring bulb containers.  Lucky for me my client Marge handed me a cup of coffee and also offered me 2 slices of cinnamon toast. It is safe to say I have been on call to do their gardening needs for years and tend to think of them as friends who are also my clients.

The bulb resin containers came in two sizes 16 inches and 19 inches, and both were deep enough for the bulbs.  

Planting the spring bulbs was an easy project.  I planted the two large containers that would feature red tulips and Dutch master daffodils and the other 2 containers would feature grape hyacinth bulbs, Muscari with yellow daffodils, and narcissus bulbs. 

Then I did some smaller daffodils and tulip containers that would be kept in cold storage (average temp 48 degrees Fahrenheit)  My client said she would use the small bulb containers to decorate indoors; dining table, and coffee table, and she would give some to neighbors.

Since the bulbs came from clients' cold storage and had sprouted already I did not recommend that they put the containers outdoors especially if the weather was bitterly cold and the soil would freeze. This would not be good for the bulbs that had signs of new growth.

My client agreed and said they would put the containers on their deck where there was plenty of sun.  Then if the weather turned bitter cold again they would move to a protected area where the soil would not freeze. 


 I also recommended that the soil stay evenly moist but not wet as they did not want the bulb to dry out.

After the spring bulb container gardens were planted I went back home and got busy being productive in my own garden. Worked some on my new herb garden and also made a list of the things that I needed for the garden center at Lowe's.


This time of the year is busy for me because clients are calling for help with their yard and garden needs and I also need to get my gardens ready for spring flower blooms and garden plantings.

Today was another perfect day for working in the garden. I am glad that we have had warm days in January because I have used my time wisely by being productive in the yard and garden.


Late Season Planting: Spring Bulbs in Containers


Its January and normally I do not plant spring bulbs outdoors during this time of the year but a client emailed me and told me she had a bag of 200 mixed spring bulbs; hyacinths, daffodils and red tulips that she wanted me to plant in her plastic containers.

In the past I have planted bulbs in containers and then kept them in the greenhouse but I have never planted them for outdoors this late in the season. There will be snow this weekend and a hard frost.

I think the bulbs should be okay as long as the containers are deep and wide enough for the spring bulbs.  However I did suggest that they keep the newly planted bulb containers on their covered patio.   This area would protect them from excess ice or snow being piled up on top to the containers. Other than that I am certain that as long as I get these bulbs into a container that is mixed with compost potting soil and bone meal that they will be just fine. 

So tomorrow I am going to head over to my clients house and plant her 200 mixed spring bulbs in containers. I will do all the planting in her garage so I won't feel too cold. The spring bulb containers will be topped with a layer of cypress mulch. I think this is wise since there is snow in the forecast.

All I need to do is do the arrangement of the bulbs so they containers look pretty when they bloom, then fill the planters with the amended soil and plant the bulb according to my drawing and then water. My clients husband said he will take them outdoors.


Now I am wondering if the garden centers have any leftover spring bulbs because I would like to fill my plastic containers with spring blooming flowers also. Maybe I will run to Lowe's garden center in the morning and talk to the master gardener that oversees that department.

Learn more about planting tulips in a container by viewing this tutorial.


Wednesday, January 21, 2015

Working on Raised Garden Project


My husband asked me to extend my rock herb garden down along the side of the stepping stone path. He thought fragrant herbs along the side of the garden path would look good.  He also thought he would not have to cut the grass in this area and he really liked his idea.


It seemed like a good idea at the time to extend the herb garden, so I drew out the garden plans on paper my husband looked at me blankly and then said he thought it would be cheaper to buy a raised garden kit.  I did not agree with him but knew if I did not show him a kit he would never understand.

The first stop today was Lowe's garden center where we looked at raised garden kits. One large garden was priced at $176.93 and this kit was not big enough for our garden plans.  

The husband studied the raised garden that was on display and the good thing about these kit gardens is they do give the husbands an idea as to what they are supposed to look like and they know what material is needed to put them together.  

If you guy cannot visualize your garden plans on paper the put-together kit on display will help them understand and your husband will think you are a garden genius.  (smile)

After our trip to the garden center, there was plenty of time for me to get started with my extended herb garden.  Today husband and I removed all of the river rock that went around the herb garden. Then I used landscaper marking paint to outline the area where the new garden will be located. 

 Since the top six inches of soil are workable, the husband will remove the sod and level the area before lying down the landscape liner to prevent the weeds or wild grasses from growing.

Hopefully, by the end of the week, the sides of the raised garden will be installed and then we need to fill it with organic compost mixed with potting soil.  I like that the weather is warm this week because it is allowing me to get the gardens ready for spring planting.

Looking Forward to Spring Gardening


Daffodils
It is January and I know winter is not over but this week we have spring-like weather and I have enjoyed my time spent in the garden because the spring bulbs are blooming and there are buds on my old-fashioned lilac bushes.  

Soon there will be hundreds of daffodils followed by pink tulip flowers blooming on the slope and I am looking forward to the spring flowers and gardening.


Crocus

We will have warm weather for the next couple of days and I will be getting a jump start on my spring chores.

Instead of waiting for March, I am going to cut back my large ornamental grass garden and remove any of the leaves that have covered this garden bed. 

Ajuga burgundy glow
When this garden is cleaned up then the ajuga burgundy glow that grows close to the border stones will be able to get the nutrients from the sunlight and will produce pretty blue flowers in the spring.  

I also want to work on my herb garden because my husband would like me to extend it so it grows along the side of the garden path. I agree with him that fragrant herbs close to the path would be wonderful in summer.


The warm weather break is enjoyable, I feel renewed and looking forward to spring flower blooms and planning my summer annual flower gardens.

Tuesday, January 20, 2015

Gardening on Warm Winter Day

Today the temperature was in the mid '50s and so I took advantage of the warm weather and went to work in my garden. The snowdrops were blooming and this white flower is generally the first flower to bloom in spring.
Snowdrops and purple crocus are the first flowers in early spring

I took some time to remove the mulch from my spring garden beds and saw that the crocus and daffodils were coming up also. Now I know that these warm days is just a break because cold weather is in the forecast for this weekend, but instead of covering the new growth up with a light layer of leaves, I think I will make up my spring fertilizer.

This flower garden fertilizer is one that was passed down from my dad, he would mix 8 lbs of compost with 3 lbs of bone meal and if there was any ash left in the firepit he would add that to the wheelbarrow and mix all the ingredients with a shovel.  Learn more about this spring flower garden fertilizer here


I will put a layer of fertilizer over the flower beds and around the spring flowering shrubs. Like my lilac and forsythia and by doing this I know that when it comes time for the flowers to bloom that they will be beautiful.

I spent three hours in the garden today and really enjoyed getting my flower beds ready for the next growing season.

Sunday, December 14, 2014

Watering Houseplants with Spray-N-Grow

Last summer my neighbor bought two bottles Spry-n-grow from amazon.com and gave me one of them.  I had read about the amazing plant growth and vitality when using this nutrient formula for plants and I was happy that I got a free bottle. 

 I used the spray-n-grow for my outdoor gardens and the plants greened up quickly in the spring and were very healthy but when the cold season came I did not think to feed my indoor plants with spray n grow until I happened to come across the formula under my sink and thought I would give it a try.
Purple Orchid houseplant

I followed the directions as indicated on the bottle and mixed on a teaspoon of spray n grow in 16 ounces of water and waited a few minutes before use as this is what the direction indicated. Then I watered my house plants.

Within 10 days I did notice new leaf buds and thought that my plants looked overall greener. I will continue to water my houseplants with spray-n-grow throughout the winter months and hope that I have more orchid blooms.

Learn more about Spray-N-Grow here: 


Sunday, November 30, 2014

Updating Outdoor Planters to Winter Arrangements

Now that winter is here and I can no longer look out at my lovely gardens so I decided I would update my plastic planters by turning them into winter arrangement.

Before beginning the transformation of my window boxes and garden planters I will need to cut some branches from the evergreen trees growing in my yard and then I will cut some lower branches from our Frazier fur Christmas tree. I may have to buy some branches from the Christmas tree outlets and if so I will get some spruce and pine branches.

Whenever I put together an outdoor arrangement I always start with a resin container then fill it up with regular potting soil, then water the soil until it drains from the bottom of the planter. The first time I created a winter arrangement I used a clay pot and come January it cracked.

Putting together a winter arrangement is fun. I start with tall cut branches in the center and then add shorter branches. I like to mix up the colors of the evergreen branches because it makes the planter interesting. When the planter is filled with the evergreen branches I will then spray the greens with wilt proof.

Now I can decorate with weatherproof red bows, pine cones, honeycombs, ornaments or festive holiday bows that are hot glued to a pick. I also like to add natural holly branches with the red berries to give the arrangement some natural beauty.


Do make winter arrangements out of evergreen branches?

Save money and have fun by making outdoor winter arrangements for your plastic planters.  Here is a video that will inspire you: 


Poly Rake Product Review

This year we bought one of those large poly lawn rakes from Lowes.com garden center. This rake has no metal on it and is lighter in weight so if you have a large yard or a lot of leaves this rake sure does make removing the leaves easier.

The rake has a 46 inch handle, 30 inch head with 30 tines and the total weight is two pounds. I used this rake today and found that I did not have to bend over as much and that I could move a whole lot of leaves from under the shrubs and in the gardens with little effort.

My husband swears by a metal rake but when he picked up my rake with the cushioned handle and the next to nothing weight, well it was hard to get my poly rake back.

If you are looking for a new rake to remove the leaves from your yard then I would recommend a poly lawn rake because it gets the job down quickly and efficiently and you are not as sore as you are when you use a traditional metal rake.

Note: I would recommend that you pick up one for your husband too, because even though he may be a die hard metal tines rake fan, if he gets his hands on your rake you may not get it back. 


Monday, November 24, 2014

Winter Care for Ajuga Reptans/Creeping Bugleweed

Now that the warm days of autumn are coming to an end I thought it would best to take care of my ajuga creeping bugleweed for winter. Normally I do not do much with this hardy evergreen groundcover but last year our winter was brutal and I lost many plants and vegetation due to extreme cold weather and ice.

This year I attended to my ajuga plants by removing all of the weeds and wild grasses that were growing too close and then I applied Scotts Organics NatureScapes red mulch around the creeping bugleweed.

Ajuga puts out runners and you do want to cover up the runners. It is best to allow space in between the plant's leaves and stems. This mulch will protect the roots that grow close to the soil surface. It will also protect the plants from becoming uprooted when snow or ice starts to melt.


Here are some photographs of my ajuga gardens:


Did you know that ajuga is one of the top 10 hardy groundcovers?  Learn more about ajuga by viewing this YouTube video